If you have kids I'm almost positive you have at least one box of Mac & Cheese in your cupboard. And even if you don't have kids there's still a good chance you have some hanging around. After all, mac & cheese is an American staple. But it's SO completely laden with calories and carbs, it's unreal. I'm looking at a store brand box of the stuff and it has per 1/2 C serving 200 calories, 25.5g carbs and 270mg sodium. Those numbers are pretty high, if you ask me. Definitely higher than the recipe I'm going to give you.
There's a nutritious mystery ingredient wrapped up in this recipe, and if you don't tell the kids, they'll most likely never know the difference.
Here's what you need:
6.5 oz whole wheat elbow macaroni
8 oz fresh or frozen cauliflower
1/4 C Italian bread crumbs
4 Tbsp grated Parmesan cheese
8 oz shredded cheese, such as sharp cheddar or colby jack...whatever you like
4 oz fat free cream cheese
1/2 C 1% milk
dash salt
dash pepper
a little bit of dried parsley flakes, maybe 1 Tbsp
Here's what you do:
1. Heat oven to 350F
2. Cook pasta according to package directions. Reserve 1/2 C pasta water. Drain the rest and set aside.
3. While pasta is cooking, steam cauliflower (in a steamer or in the microwave with a smidge of water in the bowl), chop it up small and set aside.
4. In a small dish mix together bread crumbs, 1 Tbsp parmesan, and parsley. set aside.
5. After you drain the macaroni, leave it in the colander. In the same pot you cooked the macaroni, put in the shredded cheese, 3 Tbsp of the parmesan, the cream cheese, 1/2 C pasta water and milk on low heat.
6. Stir until all the cheeses are melted and combined together and creamy.

7. Add the macaroni back into the pot with the cheese.
8. Add the cauliflower to the cheese. Mix thoroughly until macaroni and cauliflower are completely covered in cheese.
9. Dump into a sprayed baking dish and top with bread crumbs. Bake for about 20 minutes.
Makes 10 servings of 1/2C each.

Sure, it's not the intense shade of radioactive yellow as you get with a box of Kraft, but it is creamy, cheesy and delicious...and much better nutrition-wise.
Here's how the numbers break down for 1/2C: 158.3 calories, 4.6g fat, 3g saturated fat, .25g polyunsaturated fat, .39g monounsaturated fat, 14.5g cholesterol, 195.8mg sodium, 192.8mg potassium, 19.9g carb, 2.6g fiber, 9.2g protein. (4 Points Plus) To further reduce the calories and fat you could use reduced fat cheddar instead of the regular cheese I used in this recipe. You could also lower a few calories and carbs by eliminating the bread crumbs on top.
I got this recipe off Pinterest from Eat Yourself Skinny, but I didn't like their original recipe. It was very dry, and they added a whole box of pasta (2x what I did here) and it was enough to feed a bleeping army. Most of it went into the trash because there was just too much. So to make it cheesier and creamier I kept the same amount of everything except cut the pasta in half. I really liked the way it turned out tonight. I think this page in my recipe book will get used quite a lot. My mom made me a blank cook book with spiral binding and a personalized cover, and I get to fill it in with all my favorite recipes. It's pretty awesome, except it's getting full really quickly. I'm going to need another one. Christmas is coming. ;) Anyways, you can always tell the recipes I use a lot because they have stains on the pages from my splatters and spills.
I really recommend you try this recipe. It's very delicious, and with the cauliflower it's a nice spin on the standard American fare.
Eat Happy!
Lisa
PS Hover over the black bar on the right side of the screen to pull out more menu options for my blog.
happyfairylove@live.com
There's a nutritious mystery ingredient wrapped up in this recipe, and if you don't tell the kids, they'll most likely never know the difference.
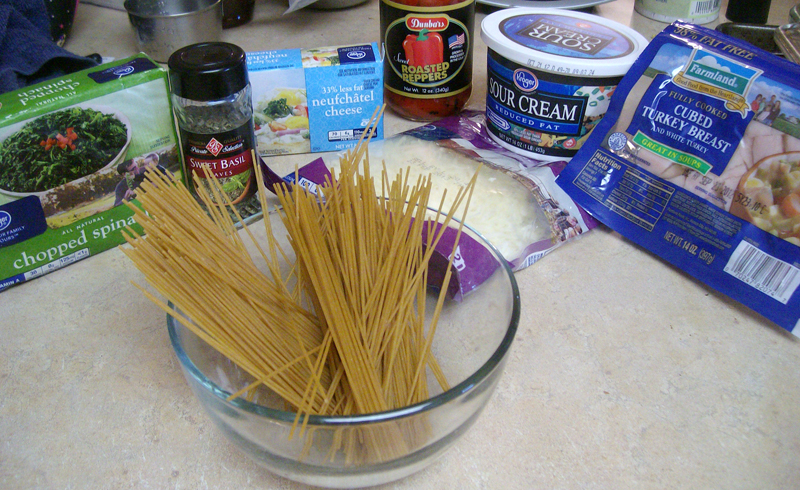
Here's what you need:
6.5 oz whole wheat elbow macaroni
8 oz fresh or frozen cauliflower
1/4 C Italian bread crumbs
4 Tbsp grated Parmesan cheese
8 oz shredded cheese, such as sharp cheddar or colby jack...whatever you like
4 oz fat free cream cheese
1/2 C 1% milk
dash salt
dash pepper
a little bit of dried parsley flakes, maybe 1 Tbsp
 |
| elbow macaroni |
 |
| cauliflower |
 | |
| I just now realized that someone in this house bought 2% milk. I always buy 1%, and the nutritional values in this recipe are calculated for 1% milk. |
1. Heat oven to 350F
2. Cook pasta according to package directions. Reserve 1/2 C pasta water. Drain the rest and set aside.
3. While pasta is cooking, steam cauliflower (in a steamer or in the microwave with a smidge of water in the bowl), chop it up small and set aside.
4. In a small dish mix together bread crumbs, 1 Tbsp parmesan, and parsley. set aside.
5. After you drain the macaroni, leave it in the colander. In the same pot you cooked the macaroni, put in the shredded cheese, 3 Tbsp of the parmesan, the cream cheese, 1/2 C pasta water and milk on low heat.
6. Stir until all the cheeses are melted and combined together and creamy.

7. Add the macaroni back into the pot with the cheese.
8. Add the cauliflower to the cheese. Mix thoroughly until macaroni and cauliflower are completely covered in cheese.
9. Dump into a sprayed baking dish and top with bread crumbs. Bake for about 20 minutes.
Makes 10 servings of 1/2C each.

Sure, it's not the intense shade of radioactive yellow as you get with a box of Kraft, but it is creamy, cheesy and delicious...and much better nutrition-wise.
Here's how the numbers break down for 1/2C: 158.3 calories, 4.6g fat, 3g saturated fat, .25g polyunsaturated fat, .39g monounsaturated fat, 14.5g cholesterol, 195.8mg sodium, 192.8mg potassium, 19.9g carb, 2.6g fiber, 9.2g protein. (4 Points Plus) To further reduce the calories and fat you could use reduced fat cheddar instead of the regular cheese I used in this recipe. You could also lower a few calories and carbs by eliminating the bread crumbs on top.
I got this recipe off Pinterest from Eat Yourself Skinny, but I didn't like their original recipe. It was very dry, and they added a whole box of pasta (2x what I did here) and it was enough to feed a bleeping army. Most of it went into the trash because there was just too much. So to make it cheesier and creamier I kept the same amount of everything except cut the pasta in half. I really liked the way it turned out tonight. I think this page in my recipe book will get used quite a lot. My mom made me a blank cook book with spiral binding and a personalized cover, and I get to fill it in with all my favorite recipes. It's pretty awesome, except it's getting full really quickly. I'm going to need another one. Christmas is coming. ;) Anyways, you can always tell the recipes I use a lot because they have stains on the pages from my splatters and spills.
I really recommend you try this recipe. It's very delicious, and with the cauliflower it's a nice spin on the standard American fare.
Eat Happy!
Lisa
PS Hover over the black bar on the right side of the screen to pull out more menu options for my blog.
happyfairylove@live.com