Showing posts with label cream cheese. Show all posts

Wednesday, February 27, 2013

Crescent Roll Veggie "Pizza"

Here is a recipe that is good for parties, as a snack or a light lunch.  The veggies are not cooked, so it is a cold pizza, if you want to call it that.  It is very tasty, whatever it is!

You will need:

1 refrigerated tube of crescent rolls
4 oz reduced fat cream cheese
2 good size cloves of garlic
2.5 oz each chopped broccoli and carrots
1 cup shredded cheese

You'll want the cream cheese to be room temperature for easier mixing and spreading, so take it out well in advance of making this recipe.  The crescent rolls, on the other hand, need to be nice and cold right out of the fridge so they don't stretch and lose their shape. 

You might want to spray your baking sheet very lightly with cooking spray.  I used a piece of parchment paper to make sure the rolls didn't stick.

Directions:

1.  Preheat oven to 375F.
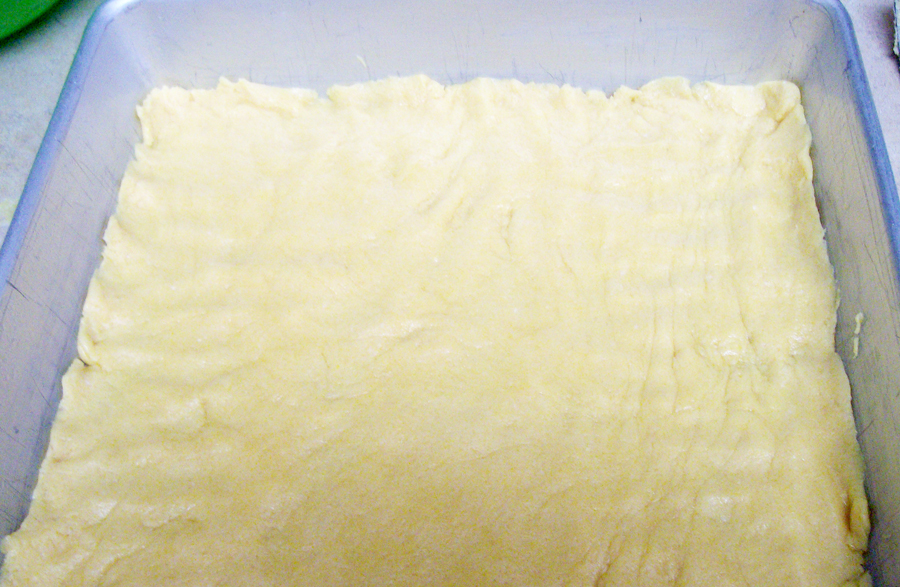
2.  Open the tube of crescent rolls and don't tear apart the triangles.  Pull them apart at the half way line.  Then unroll the rolls carefully so they lay flat on the pan.  Pinch together the seams.  Unroll the other half and lay it next to the first half and pinch those seams, too, so that it makes a rectangle of flat dough on the pan.
3.  Bake for about 12-13 minutes or until it starts to turn golden.
4.  While that is baking, prepare the garlic.  If you have a garlic press, you are so lucky!  (I want one.)  I don't have one, so I had to mince my garlic and then mash it with a fork on a plate.  You'll want to mash the garlic really well so the oils are released.  That way it will add tons of flavor.
5.  Mix the mashed garlic into the cream cheese until smooth and well incorporated.
6.  When the dough is cooked and cooled, spread the cream cheese very carefully (the top will flake off a bit) over the dough.
7.  Either chop the vegetables with a knife, or, for easier preparation, put them in a food processor (like my most favorite tool ever, the Ninja Express Chop.) and chop it up really good. 
8.  Sprinkle a layer each of the carrots and then the broccoli over the cream cheese spread.
9.  Top with shredded cheese.
10.  Cut into 8 pieces (or smaller if you are serving at a party or something.)

Nutritional stats:
181.6 calories, 10.6g fat, 6g sat fat, 1g polyunsaturated fat, 2.5g monounsaturated fat, 17.5mg cholesterol, 359mg sodium, 196mg potassium, 14.4g carbs, .5g fiber and 7.3g protein.  I'm not sure, but I think that the carrots and broccoli are "free" foods in WW, so I calculated the Points Plus at 5.

It would also taste really good with some chopped green onions mixed into the cream cheese with the garlic.  (!  I have to try that next time!)  Two pieces would be a nice lunch.  One piece is a good snack.

Hope you enjoy your veggie pizza!

Lisa
happyfairylove@live.com

Saturday, February 23, 2013

Say Cheeeeeeesecake! (healthier and portion controlled Recipe, Pics, Review)

omg, do you just love cheesecake???  I thought I'd never be able to have it again without gaining some pounds.  But, lucky for me, I found a "healthified" version that I made today.  How about cheesecake with only 10g carb?!?!  I am so excited to share this with you, in fact, that they are still in the refrigerator cooling.  My son, Matthew, and I shared one while it was still warm and then put the rest back in to chill.

I found this recipe, like so many of my others, on dLife.  I altered it a bit, and I think my version is very good.  Here's what you will need to make 18 mini cheesecakes:

Cupcake liners or cooking spray
18 Nilla Wafers (I did not use Fat Free...they were out.  But if you wanted to save a calorie or two that would be an option for you.)
16 oz Fat Free Cream Cheese, softened
1/4 C Sugar
1/2 C Granulated Stevia
1 1/2 Tbsp White Flour
1 1/2 tsp Vanilla Extract
1 Whole Egg
1 Egg White
2 C Mixed Berry Frozen Fruit, thawed, chopped up

Unlike "real" cheesecake, these are so simple to make!  You will be amazed at how fast you can whip these up.

Preheat oven to 325F

1.  Either line muffin tins with cupcake papers or spray with cooking spray.
2.  Place 1 Nilla wafer in the bottom of each cup.
3.  Beat the cream cheese in a medium mixing bowl with an electric mixer on medium speed until smooth.
4.  Add in sugar, Stevia, flour and vanilla.  Beat on medium speed until well combined and smooth.
5.  Add in egg and egg white.  Beat on low just until combined well.
6.  Add 1 dollop of mixture (I measured a "dollop" to be about 1/8 C...it's a well-rounded larger spoonful...the tablespoon, but not the measuring kind of tablespoon.  Just a regular tablespoon.)
7.  Bake in oven for 20 minutes until set.
8.  Chop up fruit after it has thawed to make it easier to spoon out just 1 tsp.

9.  Cool in pan for about 5 minutes.  Cover.  Place in refrigerator to chill for at least 4 hours, up to 24 hours.

10.  When ready to serve, remove from pan and add 1 tsp (the actual measuring kind of teaspoon this time) of chopped up fruit onto the top of each cheesecake.  Serve and enjoy!


Matthew and I couldn't resist taking a taste before they were chilled because the kitchen smelled so good after they baked for 20 minutes.  I let them cool only about 10 minutes and got one ready.  I took a taste first.  Heaven!!!  It might not be as totally sweet as cheesecake, but it is sweet enough, especially with the fruit on top, to satisfy any craving.  Rich and delicious.  These would be so awesome to serve as dessert for dinner guests.  And so perfect, too, because they are very simple and quick to make.  Matthew loved it.  A few minutes later he asked me again, "How much longer until they're ready?"  After two bites he is totally ready for more!  I have to admit, I am too!

Here are the stats on 1 mini cheesecake:

71.4 calories, .9g fat, .25g saturated fat, 15.3mg cholesterol, 200mg sodium (blame the cream cheese for all the sodium in this one), 20mg potassium, just 10g carb!!!, and 4.4g protein.  (2 Points Plus) How about that?  And the really beautiful thing is that these cheesecakes are portion controlled, so try to just have one.  Take small bites and savor them slowly.

I highly recommend trying these delicious and easy to make mini cheesecakes.  I think you will love them.  Feel free to leave a comment here or you can always drop me a line at happyfairylove@live.com.

Sweet Treats!
Lisa
PS  To see more about me, this blog, my links, archives and search words, hover over the black bar on the right to pull out more options.


Sunday, October 14, 2012

Skinnier Cream Cheese Frosting for a Diet Soda Carrot Cake (or whatever kind of cake you want)

I've been making the diet soda cakes quite a lot.  In case you missed that post, click here to see it.  I've done some experimenting since that post.  I've made chocolate cakes with diet Dr. Pepper and diet Cherry Coke.  imo, I don't think it matters what type of diet soda you use, because really I can't taste any difference.  But I've also experimented with the flavors of cake mix, too.  I made a cherry chip cake and yesterday I made a carrot cake.

But, they were always naked (except the first one that I linked you to with the lemony cream topping birthday cake).  I searched and searched for some better recipes for low calorie/low carb frostings, but I couldn't really find any.  I experimented with some chocolate recipes, and they were horrible!!!  Definitely not something I would share here.

Then the other day I got a Hungry Girl email that was all about frostings.  So, I decided to try one of them but instead of Splenda I used Stevia, and less of it.  Here's what you need:
3 Tbsp sugar free vanilla instant pudding
2 1/2 Tbsp Stevia
1/2 tsp vanilla extract
1 1/2 C lite whipped cream
3/4 C fat free cream cheese, room temperature

It's pretty easy to whip some up, too.
1.  In a medium bowl combine pudding mix, Stevia, and vanilla with 3 Tbsp cold water and mix well until smooth and thick.

2.  Add in cream cheese and mix well, incorporating the vanilla in with the cream cheese until it is really combined.  It really does make a difference that the cream cheese is room temperature.  It blends much better and easier. 

3.  Add cool whip.  The original directions said to "stir until smooth", but when I just stirred and folded it, the cream cheese/pudding mixture stayed in clumps throughout the whipped cream.
(it's kind of hard to see, but click on it to enlarge it and you'll see what I'm talking about.)  So, I used my hand mixer on low speed with the whisk attachment on it instead of the beaters.  But I'm sure the beaters would work just as well.  Now, the whipped cream with be less fluffy from beating it together with the cream cheese, but I think the end product is much better this way rather than clumps of cream cheese and pudding.  It looked like curdled milk, and it just wasn't appetizing.  Here's what mine looked like after I used the mixer...
And here's what it looked like on top of a delicious piece of carrot cake...

The numbers on this cream cheese frosting are incredible!  This recipe is enough to frost one 9x13 cake, and I cut the cake into 12 servings.  So, for 1/12 there are only 28.3 calories and 3.5g carbs!  Fantastic!  The cake itself has 133 calories and 33g carbs per piece.  Not bad for an occasional dessert, treat or celebration!

The frosting is so much more subtle than store bought full fat and sugar cream cheese frostings you find on carrot cakes.  They are so heavy and overly sweet.  This recipe is lighter, creamier, and not as tooth-aching sweet as those.  It's mild, you can taste the cream cheese and it has just the right amount of sweetness between the Stevia and whipped cream.  And, imo, it tastes even better after it has been covered and refrigerated for a little while.

Hope you enjoy it!
Lisa
PS  Hover over the black bar on the right side of the screen to pull out more menu options for my blog, like the one to follow my blog.
happyfairylove@live.com


Thursday, September 20, 2012

Strawberries N Cream Bars (Recipe, Pics)

Sheer decadence.  That's all I can say.  I saw this recipe on Pinterest and changed it up to make it a little healthier.  I substituted Egg Beaters for real eggs, I Can't Believe It's Not Butter for real margarine, substituted some of the sugar with Stevia and used reduced fat cream cheese.  You still need to limit yourself to one, but if you are having a special get-together, potluck or something else where you want to serve something special (and that's soooo easy but no one has to know!), then this is a great treat for you to make.  It's an incredible, tasty little morsel for the end of a delicious dinner.

Here's what you need:

1 regular sized box vanilla or yellow cake mix
1/3 C I Can't Believe It's Not Butter
1/2 C plain Egg Beaters or other egg substitute, divided (1/4C in the dough and 1/4C in the cream cheese mixture) or 2 eggs
1 lb sliced strawberries
8 oz reduced fat cream cheese
2 Tbsp sugar
3 1/2 Tbsp Stevia
1 tsp vanilla

Here's how to make it:

1.  Preheat oven to 350F
2.  Spray 9x13 pan with cooking spray (I used a 10x10 pan)
3.  In a medium bowl combine ICBINB, 1/4C egg substitute, and cake mix.  Mash with a fork until partially combined.  It's very sticky, so we sprayed our hands with cooking spray and then used our fingers to combine it completely into a dough.

4.  Reserve 3/4C of the dough for the topping and set aside.
5.  Press the dough into the bottom of the pan, all the way to the edges.

6.  Bake for 10 minutes.
7.  While the crust is baking, slice the strawberries in approximately 1/4" slices.
8.  In a mixing bowl, beat cream cheese, sugar, stevia, vanilla and 1/4C egg substitute until creamy and well combined.
9.  Spread cream cheese mixture on top of the partially baked crust.
10.  Evenly arrange the sliced strawberries over the cream cheese mixture and then crumble the reserved dough on top of the strawberries.

11.  Bake for 25 minutes, or until crumbs on top turn golden brown.  The original directions said the center should be set, but mine wasn't really completely set; however, once it chilled it was fine to all of us.

12.  Cool completely and then chill for at least 30 minutes before servings.
13.  Cut into 20 pieces.  Store leftovers in an airtight container.
Heaven on a plate.  This is simply divine.  You need to be careful not to over-indulge here.  The calories and carbs could get away from you very quickly.  I can't imagine what the stats on this dessert would have been had I not made the substitutions I did.  They have 136.4 calories, 5.8g fat, 3g saturated fat, .7g polyunsaturated fat, .3g monounsaturated fat, 8mg cholesterol, 264mg sodium, 44.7mg potassium, 20.6g carbs, .5g fiber, 2g protein. (4 Points Plus)

UPDATE:  It's the next day after making this dessert, and I had put the leftovers in an airtight container like the directions said.  I don't recommend making this a day ahead of an event because even though it still tastes amazing the next day, it doesn't look as pretty.  The strawberries get a little bit of a dull color and they get a little soggy.  Taste-wise, still awesome, but to impress with presentation I recommend making it the same day. Texturally it's a little softer, too.  But believe me, there was no problem with making the leftovers disappear when the kids got home from school today!

Blissful Tasting!
Lisa
PS  Hover over the black bar on the right to pull out more menu options for my blog.
happyfairylove@live.com


Tuesday, September 18, 2012

Confetti Tuna (Recipe, pics) and an Appliance Review

I got a new toy yesterday, and I'm so happy about it because it made today's lunch a breeze.  I have been doing a lot of searching for a good mini food processor.  I wanted a 3 cup size, and also one that chopped well without turning things to mush or leaving part big chunks and part chopped up stuff.  There was a Black & Decker that I was looking at, but no stores carry it in stock.  You have to order it online, and I just don't have that kind of patience.  It also got mixed reviews, so I was a little hesitant.  But the one I found (and it was the last one on the shelf) at Target was this super cool little Ninja Express Chop NJ100.
A handy small applicance that actually works...and it's PURPLE!!! :)
One thing I really like about it is that the blades are at 4 different levels, so you get evenly chopped food throughout.
Can you see the blades?  They're at different levels for evenly chopped food.
The blades are razor sharp!  You press down on the top to give it a pulse (it chops when pressed, stops when released), and just a couple quick pulses and your food is chopped to perfection.  I read a lot of reviews of a lot of choppers and one thing it seems hard to find is a chopper that will chop, without automatically pureeing, the softest foods (like tomatoes) and still chop the hard stuff (like carrots).  This little gadget does it all.  If you are in the market for an awesome chopper, I highly recommend this one.  And it comes in cool colors.  And it's just at only about $20 at Target.  Great buy!!!

I have to admit, ashamedly, that I have gotten a little off track the past few weeks.  I am bipolar and I take meds for mood swings and also depression.  This past month I have been forgetting to take my meds a lot, and it has been adversely affecting my mood.  So, I've been doing a lot of emotional eating, mindlessly eating crackers and other high carb things, (even some *gasp* oreos).  I've been eating way less vegetables and protein, too.  Fortunately, I've only gained about 1/2 lb so it's not to crisis mode, but if I don't get things back under control it could quickly slip into something terrible.

On to today's recipe!  I had veggies and protein on my mind, so when I saw this recipe on dLife I knew it was the perfect thing to get me back on track.  It's called Confetti Tuna.

Here's what you need:
Look at what an amazing job my Ninja Express Chop did on these vegetables!
1 5oz can tuna, packed in water, flaked with a fork
1/2 C shredded red cabbage
1/2 C chopped carrots
1/4 C shredded zucchini
1/4 C chopped onions
3 Tbsp reduced fat cream cheese
2 Tbsp low fat PLAIN yogurt
1/2 tsp dried, crushed basil
pinch salt and pepper

Mix everything together.  The recipe said to fill a celery stalk with it.  I used it to top cucumbers.  Would be great on pita chips or maybe even rolled up in a tortilla as a salad wrap.

Doesn't it look colorful and delicious?  It is!  I want more, and since it's so healthy it will be ok for me to indulge.  Here are the nutritional numbers for a 1/4C serving:  55 calories, 2.9g fat, 1.1g saturated fat, 16.4mg cholesterol, 128.4mg sodium, 155.5mg potassium, 3.3g carbs, .5g fiber, 5.2g protein. (2 Points Plus)

Healthy Munching!
Lisa
PS Hover over the black bar on the right to pull out more menu options for my blog.
happyfairylove@live.com


Thursday, September 13, 2012

Creamy Turkey Spinach Pasta Bake (Recipe, Pics)

I don't use a lot of turkey.  I don't know why.  I love it at Thanksgiving time, and have a field day with all the leftovers.  But it seems that's the only time of year I ever make it.  I should have it more often.  I came across this recipe on Diabetic Living Online, and it looked and sounded really tasty.  I was a little skeptical of making it because it has quite a few ingredients, and I was afraid it wouldn't be simple.  It really wasn't bad, though.

Here's what you need:

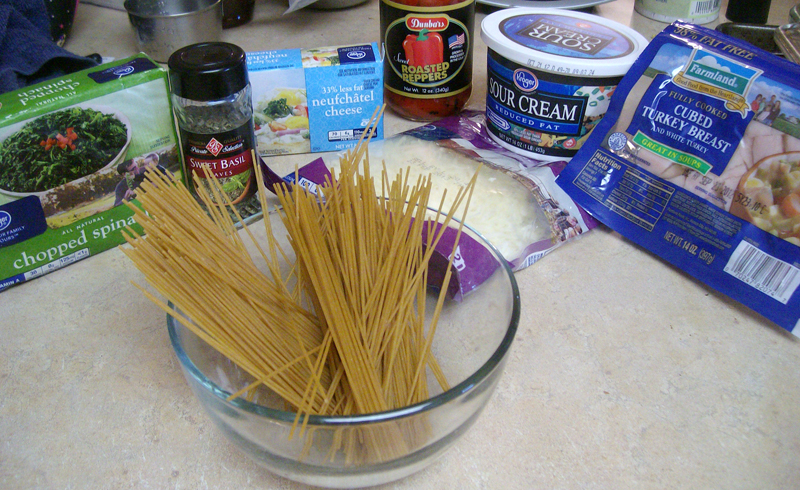
4 ounces dry whole wheat angel hair pasta or thin spaghetti
1 8 ounce package of reduced fat cream cheese (Neufchatel), softened
3/4 cup refrigerated egg substitute (or you can use 3 eggs)
1/2 C light dairy sour cream
1/4 C snipped fresh basil or 1 Tbsp dried, crushed basil
1/4 tsp garlic powder
1/4 tsp crushed red pepper
10 oz chopped cooked turkey breast (I bought packaged pre-cooked)
1 10oz package frozen spinach, thawed, squeeze-drained and shredded apart.
1 C Monterey Jack cheese, shredded
1/3 C bottled roasted red sweet peppers, chopped
Measure out your dry pasta first.


Here's what you do next:

1.  Preheat oven to 350F.  Coat a 9 inch deep pie plate or a 2 quart square baking dish (I used a 9x13 glass pan) with cooking spray, set aside.
2.  Cook pasta according to package.  Drain well, set aside.
3.  In a large bowl, beat cream cheese with an electric mixer on low to medium speed until smooth.
4.  Gradually beat in eggs and sour cream.
5.  Stir in basil, garlic powder, and crushed red pepper.
6.  Stir in spinach until evenly mixed throughout.
7.  Stir in cooked pasta, turkey, cheese and roasted red pepper.
8.  Spread mixture evenly in baking dish.

9.  Bake uncovered for 45-50 minutes or until edges are slightly puffed and golden and center is heated through.
10.  Let stand for 10 minutes before serving.  Cut into 6 portions and serve.


Matthew and I dipped a finger in the sauce before we cooked it, and he thought it tasted like one of the pasta sauces on the buffet line at Souper Salad.  It tasted pretty dang good.  He wanted to eat it just like it was. lol  But we waited for the cooked version.  Matthew and I thought Sara was a little weird because she thought it tasted like spaghetti and meatballs.  We were confused, because it doesn't taste anything like spaghetti and meatballs.  The sauce is all creams and cheeses...no tomatoes whatsover.  But, whatever, she ate it.  We all thought it was very tasty.  It was filling, too.  Jeff stopped himself with only 2 servings instead of his normal 3 or 4 lol.  Wait, now that I think about it, he came into the kitchen just a little while later and had another serving made into a sandwich.  So, yeah, he still had 3 servings.  hehehe

Tonight Sami was sick and she was alseep during dinner, so I didn't have to worry about adapting hers to vegetarian.  However, next time it will be super simple.  All I have to do is scoop a little out for her into another little baking dish without the turkey, and then mix the turkey in for the rest of us.

Here are the nutritional stats for this dish (serves 6):  335.6 calories, 37.6g fat, 11.7g saturated fat, 77.5mg cholesterol, the sodium was out the roof, and it mostly came from the fact that I used pre-packaged turkey.  Use freshly cooked turkey (ground turkey would work, too) and the sodium will be much lower, 171.6mg potassium, 22.7g carb, 2.25g fiber, 22g protein. (14 Points Plus)

Considering how many ingredients there are in this recipe, it went together fairly easily.  It was a nice change from regular pasta.  There was only 4 oz in the whole thing, but it seemed like plenty per serving to cure a pasta craving.  It was deceiving, I think, because of how filling the rest of the dish was.  It was super creamy, but had a lightness to it...not too heavy.  Overall it was very good, and we will be having this at our house again.  I hope you try this for your family...I think you'll like it!

I made this for dinner with the Mock Baklava for dessert.  Dinner and dessert BOTH only came to 48.7g carbs...pretty good!

Enjoy!

Lisa
PS  Hover over the black bar on the right to pull out more options for my blog.
happyfairylove@live.com