Showing posts with label dessert. Show all posts

Saturday, February 23, 2013

Say Cheeeeeeesecake! (healthier and portion controlled Recipe, Pics, Review)

omg, do you just love cheesecake???  I thought I'd never be able to have it again without gaining some pounds.  But, lucky for me, I found a "healthified" version that I made today.  How about cheesecake with only 10g carb?!?!  I am so excited to share this with you, in fact, that they are still in the refrigerator cooling.  My son, Matthew, and I shared one while it was still warm and then put the rest back in to chill.

I found this recipe, like so many of my others, on dLife.  I altered it a bit, and I think my version is very good.  Here's what you will need to make 18 mini cheesecakes:

Cupcake liners or cooking spray
18 Nilla Wafers (I did not use Fat Free...they were out.  But if you wanted to save a calorie or two that would be an option for you.)
16 oz Fat Free Cream Cheese, softened
1/4 C Sugar
1/2 C Granulated Stevia
1 1/2 Tbsp White Flour
1 1/2 tsp Vanilla Extract
1 Whole Egg
1 Egg White
2 C Mixed Berry Frozen Fruit, thawed, chopped up

Unlike "real" cheesecake, these are so simple to make!  You will be amazed at how fast you can whip these up.

Preheat oven to 325F

1.  Either line muffin tins with cupcake papers or spray with cooking spray.
2.  Place 1 Nilla wafer in the bottom of each cup.
3.  Beat the cream cheese in a medium mixing bowl with an electric mixer on medium speed until smooth.
4.  Add in sugar, Stevia, flour and vanilla.  Beat on medium speed until well combined and smooth.
5.  Add in egg and egg white.  Beat on low just until combined well.
6.  Add 1 dollop of mixture (I measured a "dollop" to be about 1/8 C...it's a well-rounded larger spoonful...the tablespoon, but not the measuring kind of tablespoon.  Just a regular tablespoon.)
7.  Bake in oven for 20 minutes until set.
8.  Chop up fruit after it has thawed to make it easier to spoon out just 1 tsp.

9.  Cool in pan for about 5 minutes.  Cover.  Place in refrigerator to chill for at least 4 hours, up to 24 hours.

10.  When ready to serve, remove from pan and add 1 tsp (the actual measuring kind of teaspoon this time) of chopped up fruit onto the top of each cheesecake.  Serve and enjoy!


Matthew and I couldn't resist taking a taste before they were chilled because the kitchen smelled so good after they baked for 20 minutes.  I let them cool only about 10 minutes and got one ready.  I took a taste first.  Heaven!!!  It might not be as totally sweet as cheesecake, but it is sweet enough, especially with the fruit on top, to satisfy any craving.  Rich and delicious.  These would be so awesome to serve as dessert for dinner guests.  And so perfect, too, because they are very simple and quick to make.  Matthew loved it.  A few minutes later he asked me again, "How much longer until they're ready?"  After two bites he is totally ready for more!  I have to admit, I am too!

Here are the stats on 1 mini cheesecake:

71.4 calories, .9g fat, .25g saturated fat, 15.3mg cholesterol, 200mg sodium (blame the cream cheese for all the sodium in this one), 20mg potassium, just 10g carb!!!, and 4.4g protein.  (2 Points Plus) How about that?  And the really beautiful thing is that these cheesecakes are portion controlled, so try to just have one.  Take small bites and savor them slowly.

I highly recommend trying these delicious and easy to make mini cheesecakes.  I think you will love them.  Feel free to leave a comment here or you can always drop me a line at happyfairylove@live.com.

Sweet Treats!
Lisa
PS  To see more about me, this blog, my links, archives and search words, hover over the black bar on the right to pull out more options.


Tuesday, October 23, 2012

Rich, Thick, Creamy and Guilt-Free Chocolate Frosting

You might have read my post the other day when I finally came up with, imo, the best "diet" frosting out there.  You would never ever know it was low cal/low carb.  If you want to check it out, click here.

My mission today was to make a chocolate frosting that is just as good as its vanilla counterpart.  I think I came up with a good one.  Here's what you need:
Oops!  I forgot the Stevia...don't forget the Stevia!
1 small box instant sugar free chocolate pudding mix
1 C 1% milk
2 C lite whipped cream
1 Tbsp unsweetened cocoa powder
1 1/2 Tbsp Stevia

Mix together pudding mix, milk, cocoa powder and Stevia.  Whip until it's thick.  Mix in the whipped cream until well blended, smooth and creamy.  That's it!


The recipe will cover one 9x13 cake, and 1 serving is 3 Tablespoons.  For each serving there are:  35 calories, 5.3g carbs and 1.4g protein.  Pretty dang good compared to a store bought canister of Betty Crocker or Pillsbury frosting.  Cover and keep in the refrigerator.

My family really likes it a lot, and I hope yours will too!

Until next time,
Lisa
PS  Hover over the black bar on the right side of the screen to pull out more menu options for my blog, like the tab to follow me and the tab to search past posts with lots more great healthy recipes.
happyfairylove@live.com


Saturday, October 20, 2012

Perfect Thick and Rich Vanilla Frosting That's Low Cal But You'd Never Know It

Eureka!!!  I am so excited!  If you've been reading my blog you know that I have a thing for the diet soda cakes (here and here) and that I've been having a hard time finding a recipe anywhere that was a suitable replacement for plain vanilla frosting.  I have been unsuccessful.  Nothing has worked out very well.

What's the solution when you can't find a suitable recipe?  Make one yourself, of course!  So I created my own concoction that is thick enough, has a great vanilla flavor and is creamy and decadently delicious.  And, it's super easy peasy!  (You know I like that part!)  All you need is:
Oops!  Don't forget the vanilla!
1 small box instant sugar free vanilla pudding mix (see *note)
2 C lite whipped cream
1 C 1% milk
1/2 tsp vanilla

*Note:  I used Wal-Mart brand sugar free french vanilla instant pudding mix, and I really like the flavor it has.  I also made a batch using Jell-O brand sugar free fat free vanilla instant pudding mix, and it was a little less vibrant.  If you use a plain vanilla flavor you might consider adding a Tablespoon of Stevia to the mix to give it a little sweet spring in its step.

All you do is mix the milk, vanilla and pudding mix together until it gets thick.  Then whisk in the whipped cream until it is well blended and creamy.

This frosting is different from other pudding frostings I have found because the trick that I came up with is using less milk than the box calls for and adding a splash of vanilla.  When you make the pudding by the box directions, the frosting does not have the right consistency or texture.  I decided to make the pudding thicker by adding in less milk and then finding just the right amount of whipped cream to get the right balance between thickness, fluffiness, taste and texture.  And I did it!

On top of that, it makes an amazing fruit dip!!! (click on pic for a larger view)

The best part?  The nutritional stats!  This recipe will frost one 9x13 cake.  For a 3 Tablespoon serving there are only 32 calories!!!  Can you believe that?!  Compare that to just 2 Tablespoons of Betty Crocker Vanilla Frosting.  That has 140 calories---over 100 more calories than my recipe.  Isn't that amazing?  My frosting has just 5g carbs per 3 Tablespoon serving.   Betty Crocker has 23g carbs per serving of only 2 Tablespoons.  I think it's pretty obvious the benefits in nutrition my recipe has over store bought frosting.

As I've mentioned, I've experimented with quite a few frosting recipes and mixtures.  My oldest daughter, 17, is quite finicky.  She has not liked a single one of them, and has been preferring to have her cake naked rather than have any topping.  Well, she tasted this one and exclaimed, "Delicioso!" and gave me a big thumbs up.  Woohoo!  And, I served it to one of my husband's friends last night and he thought it was excellent too.  This one definitely passes muster for imitation vanilla frosting.  You've really got try this one!  (Cover and keep in the refrigerator.)

Happy Indulgence (but don't go overboard!)
Lisa
PS Hover over the black bar on the right side of the screen to pull out more menu options, like the one to follow my blog or to search previous posts for more great healthy recipes.
happyfairylove@live.com

Sunday, October 14, 2012

Skinnier Cream Cheese Frosting for a Diet Soda Carrot Cake (or whatever kind of cake you want)

I've been making the diet soda cakes quite a lot.  In case you missed that post, click here to see it.  I've done some experimenting since that post.  I've made chocolate cakes with diet Dr. Pepper and diet Cherry Coke.  imo, I don't think it matters what type of diet soda you use, because really I can't taste any difference.  But I've also experimented with the flavors of cake mix, too.  I made a cherry chip cake and yesterday I made a carrot cake.

But, they were always naked (except the first one that I linked you to with the lemony cream topping birthday cake).  I searched and searched for some better recipes for low calorie/low carb frostings, but I couldn't really find any.  I experimented with some chocolate recipes, and they were horrible!!!  Definitely not something I would share here.

Then the other day I got a Hungry Girl email that was all about frostings.  So, I decided to try one of them but instead of Splenda I used Stevia, and less of it.  Here's what you need:
3 Tbsp sugar free vanilla instant pudding
2 1/2 Tbsp Stevia
1/2 tsp vanilla extract
1 1/2 C lite whipped cream
3/4 C fat free cream cheese, room temperature

It's pretty easy to whip some up, too.
1.  In a medium bowl combine pudding mix, Stevia, and vanilla with 3 Tbsp cold water and mix well until smooth and thick.

2.  Add in cream cheese and mix well, incorporating the vanilla in with the cream cheese until it is really combined.  It really does make a difference that the cream cheese is room temperature.  It blends much better and easier. 

3.  Add cool whip.  The original directions said to "stir until smooth", but when I just stirred and folded it, the cream cheese/pudding mixture stayed in clumps throughout the whipped cream.
(it's kind of hard to see, but click on it to enlarge it and you'll see what I'm talking about.)  So, I used my hand mixer on low speed with the whisk attachment on it instead of the beaters.  But I'm sure the beaters would work just as well.  Now, the whipped cream with be less fluffy from beating it together with the cream cheese, but I think the end product is much better this way rather than clumps of cream cheese and pudding.  It looked like curdled milk, and it just wasn't appetizing.  Here's what mine looked like after I used the mixer...
And here's what it looked like on top of a delicious piece of carrot cake...

The numbers on this cream cheese frosting are incredible!  This recipe is enough to frost one 9x13 cake, and I cut the cake into 12 servings.  So, for 1/12 there are only 28.3 calories and 3.5g carbs!  Fantastic!  The cake itself has 133 calories and 33g carbs per piece.  Not bad for an occasional dessert, treat or celebration!

The frosting is so much more subtle than store bought full fat and sugar cream cheese frostings you find on carrot cakes.  They are so heavy and overly sweet.  This recipe is lighter, creamier, and not as tooth-aching sweet as those.  It's mild, you can taste the cream cheese and it has just the right amount of sweetness between the Stevia and whipped cream.  And, imo, it tastes even better after it has been covered and refrigerated for a little while.

Hope you enjoy it!
Lisa
PS  Hover over the black bar on the right side of the screen to pull out more menu options for my blog, like the one to follow my blog.
happyfairylove@live.com


Saturday, October 6, 2012

3 Minute Prep Time Berry Medley Cobbler (recipe, pics)

It's been a few days since I posted anything new.  I've tried a few things, but they didn't quite work out.  Today's recipe was outstanding, though.  This will be a great treat for a holiday dinner dessert with family and friends, especially if served warm on a cold winter day.

I saw this recipe on Pinterest.  You can find me on Pinterest here and it was on my "Recipes That Sound Really Good" board.  This is as easy as the diet soda cake.  It basically is, but with a few minor tweaks.  Here's what you need:
Any clear diet soda will be good, like 7 up, Sprite or Sierra Mist.  Also, don't use this brand of cake.  It has a ton more calories and carbs than a Betty Crocker or Pillsbury white cake.

24 oz mixed frozen berries.  Try to get berries that are "no sugar added".
12 oz clear diet soda
1 white cake mix

Spread the berries in the bottom of a 9x13 cake pan.
Spread the cake mix over the top of the berries.  Try to break up the big lumps.  Then, pour the diet soda evenly over the cake mix, trying to cover all of the mix.
If there are big dry spots, you might want to gently stir the top around just a smidge to moisten it up a little.  I noticed when mine was cooking that there were some larger patches of plain cake mix that was still powdery.  When mine was almost done cooking I stirred (gently) the dry spots in with the berries a little better and then let it cook a little longer.

Cook at 350F for about 45 minutes.  The berries will be bubbly and the cake should be golden.  Here's what mine looked like, served up warm.
I figured the calories and everything for 1/12 of the cake as a serving.  The calories are depending on the brand of cake mix...I did not use the number for the brand shown.  I used the numbers from a Betty Crocker mix.  There are 163.3 calories, 1.25g fat, .8g saturated fat, 258.3mg sodium, 16.7mg potassium, 37.9g carbs, 3.4g fiber, .8g protein. (4 Points Plus)

This definitely passed the family taste test.  They all loved it warm.  Go ahead and try this one.  It's super easy, but if you don't tell your guests they'll think you spent a long time on it.  It's ok with me if people think I'm Captain Wonder-chef! lol

Eat Well,
Lisa
PS Hover over the black bar on the right side of the screen to pull out more menu options for my blog, like becoming a follower if you aren't already.  You are invited to join me! :)
happyfairylove@live.com


Thursday, September 20, 2012

Strawberries N Cream Bars (Recipe, Pics)

Sheer decadence.  That's all I can say.  I saw this recipe on Pinterest and changed it up to make it a little healthier.  I substituted Egg Beaters for real eggs, I Can't Believe It's Not Butter for real margarine, substituted some of the sugar with Stevia and used reduced fat cream cheese.  You still need to limit yourself to one, but if you are having a special get-together, potluck or something else where you want to serve something special (and that's soooo easy but no one has to know!), then this is a great treat for you to make.  It's an incredible, tasty little morsel for the end of a delicious dinner.

Here's what you need:

1 regular sized box vanilla or yellow cake mix
1/3 C I Can't Believe It's Not Butter
1/2 C plain Egg Beaters or other egg substitute, divided (1/4C in the dough and 1/4C in the cream cheese mixture) or 2 eggs
1 lb sliced strawberries
8 oz reduced fat cream cheese
2 Tbsp sugar
3 1/2 Tbsp Stevia
1 tsp vanilla

Here's how to make it:

1.  Preheat oven to 350F
2.  Spray 9x13 pan with cooking spray (I used a 10x10 pan)
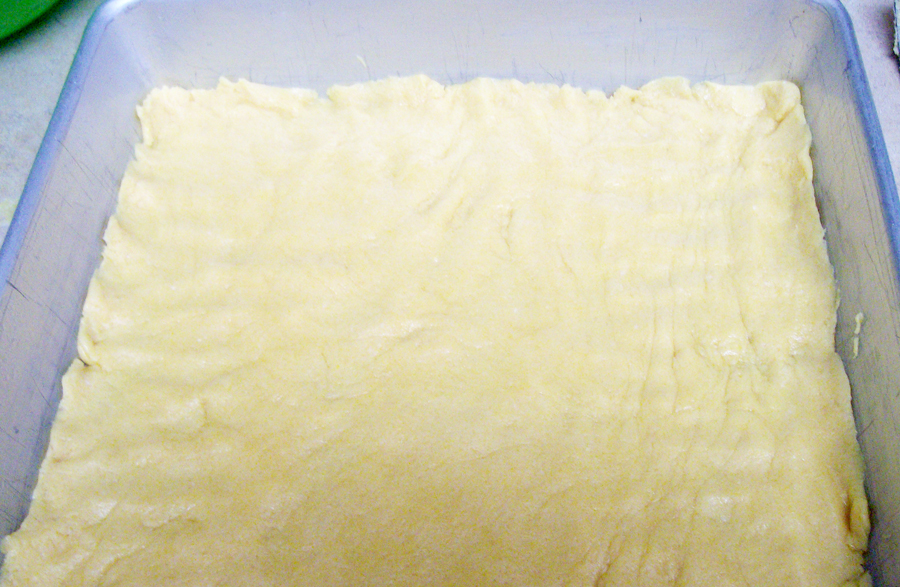
3.  In a medium bowl combine ICBINB, 1/4C egg substitute, and cake mix.  Mash with a fork until partially combined.  It's very sticky, so we sprayed our hands with cooking spray and then used our fingers to combine it completely into a dough.

4.  Reserve 3/4C of the dough for the topping and set aside.
5.  Press the dough into the bottom of the pan, all the way to the edges.

6.  Bake for 10 minutes.
7.  While the crust is baking, slice the strawberries in approximately 1/4" slices.
8.  In a mixing bowl, beat cream cheese, sugar, stevia, vanilla and 1/4C egg substitute until creamy and well combined.
9.  Spread cream cheese mixture on top of the partially baked crust.
10.  Evenly arrange the sliced strawberries over the cream cheese mixture and then crumble the reserved dough on top of the strawberries.

11.  Bake for 25 minutes, or until crumbs on top turn golden brown.  The original directions said the center should be set, but mine wasn't really completely set; however, once it chilled it was fine to all of us.

12.  Cool completely and then chill for at least 30 minutes before servings.
13.  Cut into 20 pieces.  Store leftovers in an airtight container.
Heaven on a plate.  This is simply divine.  You need to be careful not to over-indulge here.  The calories and carbs could get away from you very quickly.  I can't imagine what the stats on this dessert would have been had I not made the substitutions I did.  They have 136.4 calories, 5.8g fat, 3g saturated fat, .7g polyunsaturated fat, .3g monounsaturated fat, 8mg cholesterol, 264mg sodium, 44.7mg potassium, 20.6g carbs, .5g fiber, 2g protein. (4 Points Plus)

UPDATE:  It's the next day after making this dessert, and I had put the leftovers in an airtight container like the directions said.  I don't recommend making this a day ahead of an event because even though it still tastes amazing the next day, it doesn't look as pretty.  The strawberries get a little bit of a dull color and they get a little soggy.  Taste-wise, still awesome, but to impress with presentation I recommend making it the same day. Texturally it's a little softer, too.  But believe me, there was no problem with making the leftovers disappear when the kids got home from school today!

Blissful Tasting!
Lisa
PS  Hover over the black bar on the right to pull out more menu options for my blog.
happyfairylove@live.com


Sunday, September 16, 2012

Tangy and Delicious Lemon Squares (Recipe, Pics)

Oh, how I love the taste of lemons.  So bright and refreshing, tangy, tart and sweet with a little sugar.  Here's a recipe for a little lemon dessert, made a little healthier by using I Can't Believe It's Not Butter and Stevia to replace half the sugar (but you still need to limit yourself to just one).

Here's what you need:

3/4 C white all purpose flour
4 Tbsp I Can't Believe It's Not Butter Light
2 Tbsp reduced fat sour cream
2 Tbsp Stevia
1/2 C sugar
1/2 C Stevia
1 whole egg
2 egg whites
1 Tbsp grated lemon rind
3 Tbsp fresh lemon juice
  (I used 2 medium lemons to get enough rind and juice)
1/2 tsp baking powder
1/4 tsp salt
pinch of powdered sugar for garnish

btw, in case you don't know this (and I didn't until recently), when you measure flour you are supposed to spoon it into the measuring cup and then level it off with a knife (don't tap it on the counter to level it out) rather than just scoop the flour out with the measuring cup.  when you use the measuring cup to scoop it, it gets really packed in there and you are using more flour than you need, and also adding calories and carbs to your recipe.

Here's how to make them:

1.  Preheat oven to 350F
2.  Combine flour, ICBINB, sour cream, and 2 Tbsp Stevia in a bowl to make a soft dough.  I used a fork to mash it all together, and then Sara used her fingers to combine it into a dough.

3.  Spray an 8x8 inch pan with canola spray.  Press dough down into bottom of the pan all the way to edges.

4.  Bake 20 minutes or until golden brown.  Let cool. (My dough came away from the edges a little.)
5.  Combine sugar, 1/2 C Stevia, egg, egg whites, lemon rind and juice, baking powder and salt.  Whisk together so it is mixed well.

6.  Pour over cooled dough.
7.  Bake 25 minutes or until there is not indentation when touched.  Let cool.  Dust with powdered sugar.  Serves 12.
How delicious does that look?  It not only looks delicious, it IS delicious!  They came out very thin, but don't be deceived.  There is a ton of flavor packed into that little square.  What a nice ending to a great meal with family and friends this would be.

There are 96 calories per serving (serves 12), 2.7g fat, 1g saturated fat, 17.9mg cholesterol, 50mg sodium, 8.75mg potassium, 16.1g carb, 2.1g protein.(3 Points Plus)

I realize that I am trying to give you all healthy recipes, and I also realize that I make a lot of treats.  First of all, I believe that are things are allowed with moderation...have just one, not the whole pan.  Second of all, if you need help keeping to just one, use these dessert recipes to serve when you have guests so they can help you eat it.  They will love them just as much as you do, and they don't have to know how effortless most of what I post here is to make.  Don't tell and they'll think you're a wizard in the kitchen!  I also try to make desserts and treats with less calories and carbs by using lower fat, lower sugar substitutions.  But that doesn't mean you can mindlessly eat them while watching TV or reading Facebook.

If you find that you cannot stop with one, then it would probably be best for you, your waistline and your glucose levels to skip the treats and stick to the proteins, fiber, etc.

Want to try something a little different?  It would probably taste really good, too, with lime instead of lemon.  Orange maybe?  hmmm...if you try something different, let me know how it turns out.

Best wishes and tasty dishes,
Lisa
PS  Hover over the black bar on the right side of the screen to pull out more menu options for my blog.
happyfairylove@live.com


Wednesday, September 12, 2012

Mock Baklava (Recipe, Pics)

A couple years ago my husband and I ate a few times at a little hole in the wall Greek restaurant.  One night we got Baklava for dessert.  I thought it was absolutely scrumptious.  Several times I thought about that sweet, delectable treat and that I should try making it, but all the recipes I found for it seemed very involved.  If you haven't noticed by now, I like EASY cooking.

One day I was on one of my favorite sites, dLife, and came across this recipe for Mock Baklava.  It looked tasty AND simple, so I decided to try it.  Here's what you need:

1 cup seedless raisins (I couldn't find anything labeled "seedless", so I just got generic ole raisins)
2 oz dry-roasted walnuts
8 sheets phyllo dough, thawed
Butter flavored cooking spray...I just used my canola oil spray
1/2 C honey
2 tsp ground cinnamon
1 Tbsp melted I Can't Believe It's Not Butter, or something similar

Here are a few preliminary instructions:

I couldn't find anything called "dry roasted" walnuts.  I got a small 2 oz package of walnut pieces in the baking aisle and toasted my own.  I chopped them up into smaller pieces, spread them out on a baking sheet, heated the oven to 375F and toasted for about 10 minutes...be careful not to let them burn.  Just get toast them until they have a nice golden color and you can start to smell them.
Second, put your phyllo dough out to thaw, but DO NOT open the package!  It will dry out VERY quickly and will be ruined.

Here's what you do to make Mock Baklava:

1.  Preheat oven to 350F
2.  Combine raisins and nuts in a bowl.
3.  I covered my baking sheet with aluminum foil, and I've VERY glad I did.  The honey seeps out during baking and will make a horrible sticky mess on your pan.  I sprayed it lightly with canola oil spray.
4.  Lay down a sheet of thawed phyllo dough.  Spray it lightly with pan spray.  Lay down a total of 8 phyllo sheets, spraying lightly every other sheet.

5.  Spread the raisin and nuts on the top of the phyllo sheets, leaving a 1 inch border on all the sides.
6.  Sprinkle with the cinnamon and drizzle on the honey evenly.

7.  Starting with the long side, roll lengthwise, jelly-roll style.  Place roll with the seam side down, and tuck the ends under.
8.  Melt the butter in a dish and brush the top lightly with it.  I don't have a kitchen brush, so I just drizzled it across.
9.  Cut shallow slashes through the pastry to the raisin-nut mixture at 1 1/2" intervals so the steam can escape.

10.  Bake for 25 minutes, or until light golden brown.  Slice the pastry, using the vent lines as guides.

This was an amazing morsel of sweet, crunchy, chewy goodness!  When I put the cinnamon on I thought it looked like an awful lot, but the cinnamon flavor comes through absolutely perfectly.  The phyllo on the outside is crisp and flaky, and the inside is a little chewy and sticky from the honey and raisins.  One thing made me very unhappy, though.  It was gone too quickly. :(  lol  But it is so sweet that even one slice of it will surely cure your craving.  Needless to say, my husband and kids loved it.  Except Sami is sick and didn't try it, but she doesn't like raisins, so I don't know that she would like it.  But Matthew and Sara did.  I definitely did!

I don't know what it is with dLife and the ingredients they use.  I never come up with the same nutritional counts as they do.  Sure, I may have used a few more walnuts than they did, but their calories and carbs weren't even close to my calculations.  Are they trying to be deceptive?  Do they use secret low calorie raisins and honey?  I have no idea.  But here's what I came up with, and I am confident my numbers are accurate for the ingredients I used.  The way I do it is I have a little chart that I made.  I list every ingredient's nutritional values for the entire recipe, then I add up the totals and then divide by the number of servings.  Pretty straight forward.  Anyways, here's what I came up with per slice:  137 calories, 3.6g fat, 31mg sodium, 96mg potassium, 26g carb, .9g fiber, 1.9g protein. (4 Points Plus)

You really must try this recipe!  It is so far beyond the typical cake or cookie.  And it was EASY!  I am making this again very soon.

Treat Yourself,

Lisa
PS  Hover over the black bar on the right to pull out more menu options for my blog.
happyfairylove@live.com


Saturday, August 25, 2012

Go Ahead and Have Your Cake! (Recipe, Pics & Review)

It's my husband's birthday!  I have been searching high and low for a healthier cake recipe.  I mentioned on Facebook that I was looking, and Tawnya came to my rescue.  She told me about a recipe that she says is from Weight Watchers that uses diet soda and cake mix.  That's it.  Then, after I had been searching for 2 days on dLife and other sites, all of a sudden the same exact recipe showed up in front of me literally 5 minutes after she mentioned it.  How weird is that?  I took that as a hint that I should make it.

I ran to the grocery store as soon as it opened this morning, and I bought what I needed.  With one major mistake.  I didn't buy diet 7up.  Duh!  I bought regular.  omg, what an idiot.
Make sure you buy DIET soda!!!  Not like me who bought regular. 'doh!
I didn't realize it until after I already poured 1 cup into the cake mix.  The other 1/2 cup I used my diet Citrus Drop.  So that's all you do...12oz diet soda mixed in with a yellow cake mix.  Stir it up, pour it in a pan with pan spray on it, and bake it according to the box.  Sooo easy!!!!

I also found a recipe for a "Low-Sugar Whipped Topping" on dLife.  I bought the stuff to make it.  Here are the ingredients:
1/2 c non-fat powdered milk
1/3 c cold water
2 Tbsp fresh lemon juice (WARNING:  I only used 1 Tbsp, and it came out plenty strong.  I advise to only use 1 instead of 2 Tbsp.)
2 Tbsp sugar
1/4 c sugar substitute (equal to 1/4 c sugar)...I used Stevia.
1/2 tsp vanilla

1.  Add cold water to powdered milk and mix.  Refrigerate for 30 minutes
2.  Beat milk mixture at high speed for 4 minutes and then add lemon juice.
3.  Beat at high speed for another 4 minutes.
4.  Mix together the sugar and sugar substitute and then gradually add to the whipped milk.
5.  Stir in the vanilla and refrigerate until ready to serve.

It seemed like I was having problems with it because it was very loose.  Not the consistency I expected for a "whipped topping".  And it tasted funny.  The lemon juice to me made it taste like sour milk, and I actually only used half the lemon juice.  Not a pleasant taste.  I could see where it was going, trying to have a lemony zest to the cream, but it didn't come out as I expected.  Now, however, when I checked on the cream again in the refrigerator it is thickening up as it gets colder.  What I think I might do is try folding in just a little of this cream into the generic brand lite Cool Whip I bought on my way home from my taxi rounds this morning.  Maybe if the "Low-Sugar Whipped Topping" was mixed in with the plain whipped cream it will make the flavor a little less intense and become more of what I expected.  I will get back to you on that to see how it goes.

In the meantime, I cut a piece of cake (1/12th of the cake pan) and topped it with 3 Tbsp of lite Cool Whip (Kroger brand has 1 less g of carbs than Cool Whip).  I put just a dash of sprinkles on top with a candle, because it is, after all, in celebration of Jeff's 46th birthday.
Doesn't it look wonderful???  And let me tell you what.  The taste and texture are just divine.  It's got such a good flavor, and the lite whipped cream on top was just the right amount of sweet and lite.  Doesn't it look festive?  I will absolutely, definitely be making this again.  It crumbles a little easily, but that's not a huge problem if you're just careful cutting and serving it.

Here are the nutritional facts for 1/12 of the cake with 3 Tbsp lite whipped cream:

163 calories, 2.75g fat, 2.33g saturated fat, 265.5mg sodium, 16.7mg potassium, 33g carbs, and .83g protein. (4 Points Plus) You are saving 17.5 calories per serving in eggs and a whopping 82.5 calories per serving by eliminating the 1/2 c of canola oil.  That's exactly 100 calories less per serving, and that is quite significant in my book.  And absolutely NONE of the taste was sacrificed for the changes.

On top of that, cake normally has a frosting.  I don't know what you get, but I always get Pillsbury Chocolate Fudge Funfetti.  But per 2 Tbsp that crap has 150 calories, 6g fat, and an additional 23g carbs!  So if you do the math, a "typical" piece of cake with frosting on it is normally like 410 calories and 56g carbs!  With this diet soda cake and whipped topping you are saving about 230 calories per serving.  Amazing, huh?  I'd say with the great taste and better nutritional values, this is definitely a SCORE

If you are celebrating a birthday or other special occasion, go ahead and have a piece of this cake with a little whipped topping.  Just don't say everyday is a celebration! lol

A BIG thank you to Tawnya M. for bringing this recipe to my attention!!!

UPDATE:  I mixed in a little of the lemony cream to the plain lite whipped cream, and the flavor is much more pleasant than the straight lemon cream.  It adds just a little zing and zest without being overpowering.  Just start off with a little...maybe 1 part lemon cream to 3 parts lite whipped cream.  That's a guesstimate.  Taste it a little at a time as you go along until it's to your preference.  So, the "Low-Sugar Whipped Topping" was not a total failure after all.  It just needs to be modified from it's original version.  So if you used maybe 1 Tbsp of lemon cream to 3 Tbsp of lite whipped cream you would add 15 calories, 2.7g carbs and .75g protein to the total dessert.  Yes, I just now went and tried those measurements and it tastes good.  Just right, I think.  So, go ahead and make the "Low-Sugar Whipped Topping" after all!  It adds a nice little flair to the whipped cream.

ANOTHER UPDATE:  Matthew just came home from school and had a piece of cake with the mixture of lemon cream and lite whipped cream, and he devoured it!  It passed the 12 year old taste test!

If you would like to leave a comment here, it's so nice to get them and know someone out there is actually reading what I have to share. :)  Or, if you'd like to drop me a line you can always reach  me at happyfairylove@live.com.

Happy Celebrations!
Lisa


Monday, August 20, 2012

Strawberry Dream Mousse (Recipe and Review)

Wow, what a sweet treat this was!  I found a recipe on dLife called "Raspberry Dream Mousse", and I changed it just a little.  Primarily, I substituted strawberries for the raspberries.  Also, it called for the use of fresh fruit and ice cubes.  I saved a step and used frozen fruit.  Here are the ingredients I used (I doubled the recipe listed on dLife):

1 - .6 oz sugar free strawberry gelatin (dry mix, large box)
1 C cold water
1 - 1 lb package frozen strawberries
1 - 3.2 oz package powdered milk
It is super easy to make!

1.  In a sauce pan combine gelatin and water.  Stir well.  Let stand for 1 minute.
2.  Place pan over low heat.  Cook for just 1 minute or until gelatin is dissolved, stirring constantly.
3.  In a blender combine gelatin mixture, frozen fruit and powdered milk. (I added the strawberries maybe 3 or 4 at a time.) Cover and blend until smooth.
4.  Spoon mousse into parfait glasses and serve.

Easy!  I don't have parfait glasses, so all I had to use was little coffee cups.  lol.  I'm so unfancy at my house.
I used a 1/2 C measuring cup and put one 1/2 C scoop in each glass.  I got 6 servings with just a smidge to spare.  Perfect for your "little taste" before the company comes. ;) It would look really wonderful scooped out nicely into martini glasses (or something similar) with a few slices of fresh strawberries on top for garnish.  But, like I said, I'm not fancy and don't have such things, and this was just for my kids...they don't need fancy. lol

The texture is very thick, smooth and creamy.  It is fantastically sweet, and a little will go a long way.  My kids ate half and put the rest in the fridge for later.  I, on the other hand, ate it all.  :)  But that's ok, because the nutritional values are exceptional.  Here's the info (for the amounts and brands shown divided into 6 servings):

91.7 calories, 156.7mg sodium, 260mg potassium, 14.5g carbs, 1g fiber, 7.2g protein.  (2 Points Plus.)  This is a perfect fruit-i-liciously refreshing treat.  I highly recommend trying it.  Sooo easy to make, and simply scrumptious to eat.  My kids definitely want this again, and, if I'm ever social enough to have dinner guests, I think I might make this for dessert.  (Maybe I'll get some nicer glasses.)  I'm not sure how well it keeps in the fridge.  Since the kids put theirs in there I'll check on it every so often to see how it's holding up. (Update:  It's now the next morning, and I checked again on the cups the kids left in the fridge.  The mousse is still holding up just fine.  And if they don't wake up and eat it soon, it just may accidentally disappear! :)

Let me know if you try it.  Going to substitute different fruits?  Let me know here what you use and how it turns out.  As always, you can drop me a line at happyfairylove@live.com.

Merry Desserts!
Lisa
P.S.  I don't know how to get others to see my new blog except to ask you lovely few people who do read it to share it, either on Facebook, Twitter or your own blog.  Do you know anyone who may be interested in a healthier eating plan?  Please let them know about Losing Weight Along the Way.  Thanks so much!