Showing posts with label review. Show all posts

Saturday, February 23, 2013

Say Cheeeeeeesecake! (healthier and portion controlled Recipe, Pics, Review)

omg, do you just love cheesecake???  I thought I'd never be able to have it again without gaining some pounds.  But, lucky for me, I found a "healthified" version that I made today.  How about cheesecake with only 10g carb?!?!  I am so excited to share this with you, in fact, that they are still in the refrigerator cooling.  My son, Matthew, and I shared one while it was still warm and then put the rest back in to chill.

I found this recipe, like so many of my others, on dLife.  I altered it a bit, and I think my version is very good.  Here's what you will need to make 18 mini cheesecakes:

Cupcake liners or cooking spray
18 Nilla Wafers (I did not use Fat Free...they were out.  But if you wanted to save a calorie or two that would be an option for you.)
16 oz Fat Free Cream Cheese, softened
1/4 C Sugar
1/2 C Granulated Stevia
1 1/2 Tbsp White Flour
1 1/2 tsp Vanilla Extract
1 Whole Egg
1 Egg White
2 C Mixed Berry Frozen Fruit, thawed, chopped up

Unlike "real" cheesecake, these are so simple to make!  You will be amazed at how fast you can whip these up.

Preheat oven to 325F

1.  Either line muffin tins with cupcake papers or spray with cooking spray.
2.  Place 1 Nilla wafer in the bottom of each cup.
3.  Beat the cream cheese in a medium mixing bowl with an electric mixer on medium speed until smooth.
4.  Add in sugar, Stevia, flour and vanilla.  Beat on medium speed until well combined and smooth.
5.  Add in egg and egg white.  Beat on low just until combined well.
6.  Add 1 dollop of mixture (I measured a "dollop" to be about 1/8 C...it's a well-rounded larger spoonful...the tablespoon, but not the measuring kind of tablespoon.  Just a regular tablespoon.)
7.  Bake in oven for 20 minutes until set.
8.  Chop up fruit after it has thawed to make it easier to spoon out just 1 tsp.

9.  Cool in pan for about 5 minutes.  Cover.  Place in refrigerator to chill for at least 4 hours, up to 24 hours.

10.  When ready to serve, remove from pan and add 1 tsp (the actual measuring kind of teaspoon this time) of chopped up fruit onto the top of each cheesecake.  Serve and enjoy!


Matthew and I couldn't resist taking a taste before they were chilled because the kitchen smelled so good after they baked for 20 minutes.  I let them cool only about 10 minutes and got one ready.  I took a taste first.  Heaven!!!  It might not be as totally sweet as cheesecake, but it is sweet enough, especially with the fruit on top, to satisfy any craving.  Rich and delicious.  These would be so awesome to serve as dessert for dinner guests.  And so perfect, too, because they are very simple and quick to make.  Matthew loved it.  A few minutes later he asked me again, "How much longer until they're ready?"  After two bites he is totally ready for more!  I have to admit, I am too!

Here are the stats on 1 mini cheesecake:

71.4 calories, .9g fat, .25g saturated fat, 15.3mg cholesterol, 200mg sodium (blame the cream cheese for all the sodium in this one), 20mg potassium, just 10g carb!!!, and 4.4g protein.  (2 Points Plus) How about that?  And the really beautiful thing is that these cheesecakes are portion controlled, so try to just have one.  Take small bites and savor them slowly.

I highly recommend trying these delicious and easy to make mini cheesecakes.  I think you will love them.  Feel free to leave a comment here or you can always drop me a line at happyfairylove@live.com.

Sweet Treats!
Lisa
PS  To see more about me, this blog, my links, archives and search words, hover over the black bar on the right to pull out more options.


Saturday, September 8, 2012

Chicken A La King and Garlic Beans (Recipes, Pics, Review)

I came across this recipe on dLife and it brought back memories of one of my favorite childhood dinners.  Except when I was a kid it came out of a can, and I'm sure was out the roof with fat and sodium.  This recipe is not.  I was very excited to try this one, and I was even more excited that it looked so easy.  If you haven't noticed by now, I really like easy cooking.  I mean, really, who says it has to be complicated and take forever for it to taste good?  If the contestants on "Chopped" can make gourmet entrees with weird ingredients in 30 minutes, then I should be able to make something with ingredients as basic as chicken and a recipe in front of me in about the same, right?

The ingredients you will need are:

4 oz mushrooms
2 Tbsp canola oil
3 C fat free reduced sodium chicken broth
3 Tbsp cornstarch
1/4 C powdered nonfat milk
1/8 tsp white pepper (I don't keep that in my cupboard so I just used black pepper)
1 lb diced up cooked chicken breast
1/4 C pimento peppers, diced or chopped

And it's super easy to make...

1.  Put oil in saucepan.
2.  Chop up mushrooms in small pieces and put in pan.   Cook over medium heat until lightly browned, stirring occasionally.
3.  In a separate bowl, mix together broth, cornstarch, dry milk, and pepper until smooth.
4.  Add mixture to mushrooms and cook over medium heat until thickened, stirring occasionally.
5.  Add cooked chicken and pimento to the sauce and heat to serving temperature.
6.  Serve over whole grain toasted bread.

I served this with a side of garlic beans.  They are super way easy to make, too.

4 oz chopped up mushrooms
1 Tbsp minced garlic (I used 2 good sized cloves)
Black pepper to taste
1/2 C fat free reduced sodium chicken broth
1 lb fresh or frozen green beans

1.  Put chicken broth into the crock pot that was sprayed with pan spray.
2.  Put minced garlic in the pot.
3.  Put the green beans in the pot.
4.  Sprinkle with pepper.
5.  Put mushrooms in pot.
6.  Cook covered on high heat for about 3 hours.  Serve.
How easy is that???  I love crock pot dishes that you dump everything in and leave it to do its thing.  Here's what my dish looked like, with a few explanations.  First, I didn't have any really good, wholesome whole grain bread on hand, so I just used generic store brand wheat.  Second, the chicken looks a little skimpy because I unexpectedly had extra mouths to feed and had to stretch it a little.  To make additional sauce I whisked together 1C milk (1%) with 1 Tbsp cornstarch and threw it in with the chicken broth sauce.  I probably could have let it get a little thicker, too, but I was getting crunched for time.

This is super good on the nutritional stats!  For just the Chicken A La King, chicken and sauce, without the bread here are the facts for 1/6 of the mixture, about 3/4C or so, give or take:  193 calories, 7.4g fat, .6g saturated fat, 1.3g polyunsaturated fat, 2.7g monounsaturated fat, 64mg cholesterol, 369mg sodium, 77mg potassium, 2.3g carb, 27g protein.  (5 Points Plus)

The green beans are (for about 1/2C):  36.5 calories, 47.5mg sodium, 214mg potassium, 6g carb, 2g fiber, 1.8g protein.

Add in your favorite whole grain bread, toasted, and you've got yourself one healthy meal.  My family loves biscuits and gravy, which is off our list now because of the fat, calories, carbs, etc.  This, for them, was reminiscent of that.  I served theirs with a jumbo biscuit, but when I realized how that one biscuit totally decimated the health stats, I opted for a couple slices of wheat bread for a fraction of the calories, carbs and fat.  But some good, dense whole grain bread would have been even better.  For me, the taste was even better than what I remembered as a kid getting from the canned chicken a la king.  It sure does make a difference when you use real ingredients!  My whole family, plus our guest, really ate up this dish quickly.  I would have liked it even better if I had the time to let the sauce get a little thicker.  The garlic beans were a big hit with everyone, even the kids. 

I hope you try this recipe.  I think you will really enjoy it.  And, bonus, it was so easily converted to vegetarian for Sami.  Before I added the chicken to the sauce, I scooped out a cup of it and put it in another little pot with her cut up Quorn brand vegetarian chicken.  Easy peasy lemon squeezy!  Oh...I forgot!  When I cooked up the chicken I sprinkled it with pepper and just a little garlic powder to season it.

If you would like to leave a comment here, please do!  I can also be contacted at happyfairylove@live.com.

Eat Healthy!
Lisa
PS  Hover over the black bar on the right side to pull out more options for my blog.


Wednesday, September 5, 2012

Pork It's What's For Dinner (Recipe, Pics, Review)

I don't know about you, but I LOVE pork.  Any of it.  All of it.  I think it's my favorite kind of meat.  And I like it in very specific ways.  I'm picky, and so is my family.  So it was a little scary when I went outside our comfort zone and made pork in a whole new way (for us, at least).  Usually I use Shake N Bake pork chops, or if I feel like making a really big mess I use eggs, flour, fry on each side and then bake.  Haven't done that in a while, though.  It is VERY messy and takes a long time.  Tonight's dinner was easy, no fuss no muss.  That's the way I like it!  I made Apple Mustard Glazed Pork Chops.  How does that sound?  I've always heard that apples go well with pork, but I've never tried it.  So tonight was a first for us.  Here's what you need:

1 lb Boneless Center Cut Pork Chops 3/4" thick (trim fat if there's a lot)
Pepper
1 tsp Canola Oil
1/4 C Apple Juice
2 Tbsp Apple Jelly
2 Tbsp Dijon Mustard

My regular grocery store (Fry's) didn't carry any apple jelly.  I found a jar, though, at Super Wal-Mart for just $1.50.  I'm sure healthy food stores would carry it, too.

Here's what you do to make the chops:

1.  Season with a little pepper.  Heat oil in large non-stick skillet over medium high heat and brown chops on one side.
2.  Mix juice, jelly and mustard in a little dish.  I used a fork to mash up the jelly to get it mixed together well.
3.  Turn chops.  Add juice/jelly/mustard mixture to skillet.

4.  Reduce heat to low.  Cover and cook for about 10-12 minutes.  To check doneness, cut into the middle of the thickest chop and make sure it's cooked through before removing from heat.

That's it!!!  One little dish and one pan!  wooo hooo!  I was very nervous to serve this to my family since they are not used to the flavors.  But my kids came through for me.  They loved it!  Matthew had a 2nd piece, and Sara went and got extra pan sauce for hers.  My husband, Jeff, ate his up pretty quickly.  It was a success!  Yea!  It was even easier and less messy than Shake N Bake.  I love easy and no mess.

Here are the nutritional values for 1/4th of recipe (4 oz piece of meat and 1/4 of pan sauce):  300 calories, 5.8g fat, 4.1g saturated fat, 2.2g polyunsaturated fat, 84mg cholesterol, 418mg sodium, 490mg potassium, 8.4g carb, 32g protein.  (5 Points Plus) It's a little high in calories, but definitely worth it.  The carb count and grams of protein are phenomenal, though.

So go ahead and try something new....Apple Mustard-Glazed Pork Chops is a good place to start!  If you'd like to leave a comment, please do.  You can always reach me, too, at happyfairylove@live.com.

UPDATE:  I made 8 pork chops, and after everyone ate, there was just one left.  Matthew, my 12 year old, came in about 2 hours after dinner and asked me if he could have another dinner.  So, he ate the last one.  Jeff had I think 3 chops himself.  I wanted more, but I stuck to 1 serving like a good girl.  Jeff said numerous times throughout the evening how good the chops were.  Point is, the family REALLY loved these chops.  I hope yours does too!

Eat Happy!
Lisa
PS  If you'd like to see more about me or my blog, want to see my links, see the archives list or key word search for my blog, hover over the black bar on the right to pull out more menu options.
Saturday, September 1, 2012

A Savory Side (Recipe Pics & Review)

I've been giving you recipes for main dishes, like the Honey Pecan Chicken, Tilapia, and Chicken Eggplant Casserole.  I've given you some good recipes for sweet treats like Strawberry Dream Mousse and Diet Soda Cake.  Now I thought I should give you a recipe for a side dish.  One of my family's favorite vegetables is broccoli.  We have it a lot, just steamed, no butter or salt or anything.  I got them used to eating it plain and they like it that way.  Sometimes, though, a little cheese and seasoning is a nice switch.

I got this recipe from one that I pinned on Pinterest.  I am not real good with Pinterest yet, and I don't know who the original recipe was from.  But the pin is on my Healthy Cooking board if you want to figure it out.  (To find me on Pinterest, hover over the black bar on the right and look for the Where to Find Me tab.  My links are on there.)

The ingredients are:

16 oz fresh or frozen broccoli, steamed and chopped
1 C Italian seasoned bread crumbs
3 Eggs
1 C shredded colby/jack or cheddar cheese (the original recipe calls for 1/2 C, but I don't think that's enough cheese for that much broccoli)

Preheat oven to 375F

Put everything into a bowl and mix it up.  I tried mixing it with a whisk (definitely didn't work) and a spatula (not good either), and it came down to just getting my hands dirty and mixing it up the best I could.

Then the original recipe says to line a pan with parchment, but I didn't have any of that.  I used aluminum foil with pan spray on it.  Now, mine did stick to the foil a bit, so if you have it try the parchment, or maybe even waxed paper.

Anyhoo, make some patties...it was a little difficult because the mixture kept sticking to my hands when I tried to "pat the patty" (hehe)  So I ended up just putting a small mound on the pan and then shaping it from there.  There will be enough mixture to make 8 patties of a fair size...a little bigger than a golf ball maybe.

Bake for 15 minutes, turn patties over and then continue to bake for another 10 minutes.  I served 2 patties per person.

I made a pork chop dinner tonight.  Whenever I have pork chops it seems that all my target numbers for calories, saturated fats, proteins, etc. all fall in line.  I don't know what it is about pork.  I think maybe because it fills me up well enough that I don't feel like snacking at all.  I also made mashed potatoes and gravy.  One serving of pork chops is about 4 oz, mashed potatoes are 1/3 C and gravy is 1/4 C.  I used Walmart brand instant potatoes and Walmart brand Mushroom Gravy packet.

For just the broccoli patties, the nutritional information for 2 patties (of 8 total) is:  118 calories, 3.8g fat, .9g saturated fat, 73mg cholesterol, 248.8mg sodium, 228mg potassium, 2.48g fiber and 6.6g protein. (3 Points Plus)

If you'd like to have this entire dinner, the nutritional info (including pork flavored shake & bake) with the serving sizes I mentioned is:  577 calories, 8.6g fat, 4.9g saturated fat, 157mg cholesterol, 754mg sodium, 1005mg potassium, 42g carb, 4.5g fiber and 41.6g protein. (10 Points Plus for whole dinner)

Now, what did my family of taste testers think of the broccoli patties?  They were a success!  Everyone liked them and ate them up just fine.  To me, they seemed a little dry, but that could be from a couple different things.  1) I was in a super hurry and didn't have time to really mix the ingredients well, so the eggs and cheese weren't evenly spread throughout the broccoli.  and 2) the directions say to cook at 375F.  I cooked mine at 400F because that's what my pork chops were cooking at.  I could have turned down the heat on the chops and cooked those 5 minutes longer, but the way I did it the broccoli patties somehow got a little dry.  But that didn't take away from the flavor.  And, I don't know about you, but when I've got a plate of potatoes, meat, gravy and vegetables, everything goes in on a bite, so the gravy moistened up the broccoli perfectly.

My family and I do recommend trying this recipe.  It was a nice switch up from the plain steamed broccoli we normally have.  I hope you enjoy it!  Leave a comment here or drop me a line at happyfairylove@live.com.

Merry Meals,
Lisa
P.S. To see more about me, this blog, search words, archives, etc. hover over the black bar on the right to access additional menu options.


Thursday, August 30, 2012

Cooking With Fresh Herbs and a Catch (Recipe, Pics & Review)

When I started this blog I told myself I was going to try new things and really go outside our normal fare and expand our palates.  Today was a big day for me.  I went waaaaaay outside the box today.  I made something that I have never liked since I was a kid.  When my mom cooked it I hated it so much that she gave me a peanut butter and jelly sandwich instead.  Well, before I get further into that I will tell you that I, for the first time tonight, used fresh herbs.  I have always used dried.  I used rosemary, thyme and parsley.  When I cut the sprigs I didn't even know if I needed to take all the leaves off the stems, or if the stems are ok to eat.  I'm clueless.  lol  With the rosemary I took the leaves off the stem because it looked pretty thick.  But with the thyme, I tried taking off the leaves but the stems were so soft they just broke off with the leaves.  So I took out some of the bigger stems and figured the smaller ones were pretty soft so they must be all right to eat.

What did I make tonight?  Fish.  I have always hated the smell of it, hated the taste of it, hated the texture of it...have never liked anything about it.  But, I thought, that was when I was a kid.  Maybe my tastes have developed and become a little more sophisticated with age.  I asked around and a lot of people recommended tilapia.  They said it is a mild flavored fish that doesn't stink a lot.  I searched on dLife for a recipe and found one for "Tilapia with Fresh Herbs and Lime".  That sounded good enough, so when tilapia went on sale at my grocery store this week, I took advantage and bought some.  One good thing is that it wasn't terribly expensive.  Just $6.99 per pound.  And one package had a little less than a pound and it looked like quite a lot, so I figured it would be enough to feed my family.

And fish is ok for Sami too.  She is technically a "pescatarian", which is a vegetarian who eats fish.  That meant I only had to make one dinner tonight...yea!  Here's how to make Tilapia with Fresh Herbs and Lime:

Ingredients:
1-1 1/2 lbs tilapia fillets
1/4 C fresh lime juice
4 medium garlic cloves, minced
1/2 C chopped parsley
1/2 C chopped scallions
1 tsp fresh rosemary, chopped
1 tsp fresh thyme, chopped
1 tsp paprika
1 C canned unsalted diced tomatoes (but I used the whole 14.5 oz can, and they probably should have been drained at least a little bit.)

Directions:
1.  Preheat oven to 375F
2.  Rinse fillets, pat dry and set aside.
3.  In medium bowl, mix lime juice, garlic, parsley, scallions (green onions), rosemary, thyme, paprika and tomatoes.
4.  Spray baking dish lightly with pan spray.  Place fillets in baking dish.  Spread topping evenly over fish.

5.  Cover tightly with foil and bake 25 minutes, until fish flakes easily with fork.

This fish is so amazing in the nutritional aspect.  I am going to give you the information for just the fish and then for the whole dinner I made which was 5 oz fish, 3/4 c cooked rainbow quinoa and 2 oz steamed asparagus.  Here's what it looked like all served up:
Looks good, doesn't it?  And my house didn't smell after it cooked!  Bonus!  Anyways, the fish's stats are:  181 calories, 3.8g fat, 1.3 saturated fat, .85g polyunsaturated fat, 1.4g monounsaturated fat, 80mg cholesterol, 79mg sodium, 538mg potassium, 0g carbs, 0g fiber, 37 whopping grams of protein. (4 Points Plus for the fish)

For the whole meal the numbers are:  376.6 calories, 7.6g fat, 1.79g saturated fat, 2.24g polyunsaturated fat, 2.1g monounsaturated fat, 80mg cholesterol, 224.7mg sodium, 1036mg potassium, 32.8g carbs, 3.9g fiber, 44.2g protein.  Talk about healthy and nutritious!!!  Holy cow! (9 Points Plus for whole dinner)

Now, for the taste test of my family.  Sami liked it and ate it.  Matthew sort of liked, but didn't like the after taste and only picked at it.  Sara and I spit it out.  Sara said it "tastes like plants".  Guess that would be the rosemary and thyme. lol  I did not like the taste or texture.  But I have never been a fish lover.  Now, I can tell that if I was someone who liked fish, this would be a very good fish to have.  Yes, the taste is very mild and the texture is soft and flaky.  So you may very well love it.  Jeff, who has always liked many types of fish, had 3 helpings of it and thought it was really good.

I would recommend this recipe for those of you who either like fish already or for those who want to try a mild-flavored fish.  It very well may be that my childhood memories of my aversion to fish got in the way of me really being open-minded about this dish.  I will try fish again.  I'll keep at it, staying on my course to try new things.  I think next time I will try salmon.  I seem to remember liking salmon patties when I was a kid...it reminded me of tuna, and I do like tuna (from a can).

The meal was overall easy to make.  I forgot to mention how to cook quinoa, in case you don't know.  First of all, I recommend buying it from the bulk section of your local healthy food store or farmer's market.  It is much more economical than buying the little boxes.  Those are waaaay over priced in my opinion.  Anyways, the rule of thumb is 2 parts water to 1 part quinoa.  It will bulk up about 3 to 4 times the dry measurement when cooked.  I used 1 1/2 C dry quinoa and 3 C water (I should have used stock for more flavor) and it made more than enough to feed my family of 5.  Next time I'll try to remember to use just 1 cup.  So put the liquid and quinoa in a pot over high heat and heat to a rolling boil.  Cover it, lower the heat to a simmer and cook for about 15 minutes or until the liquid is absorbed.  I thought the rainbow quinoa made the plate look visually inviting, as opposed to just the drab color of plain quinoa.  But they taste the same as far as I can tell.  I will make more quinoa dishes in the future, because it is really good...very bland unless you mix other flavors into it, though.  That's why I should have used a vegetable or chicken stock instead of just water.  But I added a little salt and that perked it up a bit.

Have any comments?  Please feel free to leave them here, or you can always reach me at happyfairylove@live.com.

Best Dishes,
Lisa
NOTE:  For more options on my blog such as key words, past blog post archives, my facebook link and other stuff, hover over the black bar on the right side of the screen.


Tuesday, August 28, 2012

Easy Home Made Soup (Recipe, Pics & Review)

I think I have told you all before that finding dinners for my family is often challenging.  The main reason being my 16 year old daughter has been a vegetarian for about 4 years now.  That means I have to make dinners for 4 carnivores and 1 herbivore, so I need recipes that are easily modifiable to vegetarian.

Tonight I was going to go straight vegetarian with a home made Vegetarian Vegetable Soup.  I told this to my husband, Jeff, and he says, "What?  No meat?"  *sigh*  I can never win.  Fortunately I had cooked up some chicken for tomorrow night's dinner yesterday, so all I had to do was cut it up and heat it.  Usually I wouldn't have had any defrosted if I wasn't planning on using it that day.  He just happened to luck out.

I made a recipe once for a Vegetarian Tortilla Soup, which I may post one day, but I changed a few things on that recipe to come up with the Vegetable Soup I made tonight.  Please note, when you read the ingredients, I did use canned corn, peas and green beans.  You could greatly reduce the sodium content by using fresh or frozen vegetables.  Also, my store doesn't carry low sodium vegetable broth.  If yours does, you should get that.  The nutritional values at the end are for the ingredients I used.  Here are the ingredients:

6-8 Servings

1 1/2 C (or 1 can) corn
1 1/2 C (or 1 can) peas
1 1/2 C (or 1 can) green beans
6.5 oz (about 2 bunches or 4 C) fresh spinach, stems cut off, leaves cut in half
1 small can diced fire roasted tomatoes
3 cloves garlic, chopped
4 C vegetable broth
1 med to large onion, chopped
3 C frozen hash browns or diced potatoes
2 C butternut squash, cooked
Real shredded Parmesan cheese for garnish

To cook the squash, cut in half length-wise and put face down in a baking dish.  Add about 1 inch of water to the dish and bake at about 400F for around 45 minutes to 1 hour, until fork tender.  Take out of the oven, seed it, and cut it up with the skin removed.  (Or just scoop it out of the skin.)
My daughter, Sara, helped me tonight.  She had fun seeding the squash.
1.  Put a little canola oil in a pan, heat it up and add onions and garlic.  Cook onions and garlic until they are golden.
2.  In a blender, put the can of tomatoes, 2 C of cooked butternut squash, onions and garlic.  Process until smooth.  Add to soup pot.

3.  To the soup pot add in the 4 C of vegetable broth.
4.  Add in all the vegetables except the spinach.  Heat to boiling, then reduce heat and simmer for a few minutes.  Add salt and pepper to taste.  If you know how to use herbs, this would probably taste good with a little oregano and/or basil.  I'm just not familiar with using them in recipes I create and wouldn't know how much to add for it to taste good.
5.  About 3 minutes before serving add spinach to pot and stir.

At this point, if you would like to add some chicken or beef, instead of adding it to the pot which would defeat it being a vegetarian dish, just add some meat to the bottom of the bowls for your carnivores.

6.  Ladle soup into bowls and top with a little bit of Parmesan cheese.

I really like this soup.  I am going to get more daring with a few herbs, though.  The fire-roasted tomatoes and the squash give it both a little zest and body.  I'm not a big fan of squash, but I like it in this recipe because it is not an overpowering flavor.  I'm sure that fresh/frozen vegetables would be much better than the canned I used...and way better on the sodium, too.  My family all liked it with the chicken, except Sami, of course, who liked it just vegetarian.  It would be really good served with a nice little side salad as well.  With the cooler weather coming (soon, I hope!) soups will probably be a good go-to meal for a lot of people.  This one is relatively easy and it's pretty quick to make.  It's not one of those that has to cook for hours and hours.  The longest thing is cooking the squash, but all that is is putting it in the oven and letting it go.  It's pretty difficult cutting a raw butternut squash, though, so use a large knife and please be careful!

Here are the nutritional values per serving (based on 6 servings):  209 calories, 1g fat, 1079mg sodium (remember, use fresh/frozen vegetables to cut this number way down!), 1052mg potassium (wow!), 45g carbs, 7.9g fiber and 7.75g protein.  (5 Points Plus) If you add chicken or beef, remember to add those calories and protein on to these numbers.

If you try this, let me know if you add any herbs to it, how you like it, how much of what you added, etc.  Then I can try it, too, and put out an update.  Leave me a comment here or drop me a line at happyfairylove@live.com.  PLEASE tell your friends and family about my blog.  I'd really like to get more readers, and if you mention it to people you never know who may thank you for hooking them up with some good, healthy recipes and info.

Peace,
Lisa
NOTE:  For more options on my blog such as key words, past blog post archives, my facebook link and other stuff, hover over the black bar on the right side of the screen.


Saturday, August 25, 2012

Go Ahead and Have Your Cake! (Recipe, Pics & Review)

It's my husband's birthday!  I have been searching high and low for a healthier cake recipe.  I mentioned on Facebook that I was looking, and Tawnya came to my rescue.  She told me about a recipe that she says is from Weight Watchers that uses diet soda and cake mix.  That's it.  Then, after I had been searching for 2 days on dLife and other sites, all of a sudden the same exact recipe showed up in front of me literally 5 minutes after she mentioned it.  How weird is that?  I took that as a hint that I should make it.

I ran to the grocery store as soon as it opened this morning, and I bought what I needed.  With one major mistake.  I didn't buy diet 7up.  Duh!  I bought regular.  omg, what an idiot.
Make sure you buy DIET soda!!!  Not like me who bought regular. 'doh!
I didn't realize it until after I already poured 1 cup into the cake mix.  The other 1/2 cup I used my diet Citrus Drop.  So that's all you do...12oz diet soda mixed in with a yellow cake mix.  Stir it up, pour it in a pan with pan spray on it, and bake it according to the box.  Sooo easy!!!!

I also found a recipe for a "Low-Sugar Whipped Topping" on dLife.  I bought the stuff to make it.  Here are the ingredients:
1/2 c non-fat powdered milk
1/3 c cold water
2 Tbsp fresh lemon juice (WARNING:  I only used 1 Tbsp, and it came out plenty strong.  I advise to only use 1 instead of 2 Tbsp.)
2 Tbsp sugar
1/4 c sugar substitute (equal to 1/4 c sugar)...I used Stevia.
1/2 tsp vanilla

1.  Add cold water to powdered milk and mix.  Refrigerate for 30 minutes
2.  Beat milk mixture at high speed for 4 minutes and then add lemon juice.
3.  Beat at high speed for another 4 minutes.
4.  Mix together the sugar and sugar substitute and then gradually add to the whipped milk.
5.  Stir in the vanilla and refrigerate until ready to serve.

It seemed like I was having problems with it because it was very loose.  Not the consistency I expected for a "whipped topping".  And it tasted funny.  The lemon juice to me made it taste like sour milk, and I actually only used half the lemon juice.  Not a pleasant taste.  I could see where it was going, trying to have a lemony zest to the cream, but it didn't come out as I expected.  Now, however, when I checked on the cream again in the refrigerator it is thickening up as it gets colder.  What I think I might do is try folding in just a little of this cream into the generic brand lite Cool Whip I bought on my way home from my taxi rounds this morning.  Maybe if the "Low-Sugar Whipped Topping" was mixed in with the plain whipped cream it will make the flavor a little less intense and become more of what I expected.  I will get back to you on that to see how it goes.

In the meantime, I cut a piece of cake (1/12th of the cake pan) and topped it with 3 Tbsp of lite Cool Whip (Kroger brand has 1 less g of carbs than Cool Whip).  I put just a dash of sprinkles on top with a candle, because it is, after all, in celebration of Jeff's 46th birthday.
Doesn't it look wonderful???  And let me tell you what.  The taste and texture are just divine.  It's got such a good flavor, and the lite whipped cream on top was just the right amount of sweet and lite.  Doesn't it look festive?  I will absolutely, definitely be making this again.  It crumbles a little easily, but that's not a huge problem if you're just careful cutting and serving it.

Here are the nutritional facts for 1/12 of the cake with 3 Tbsp lite whipped cream:

163 calories, 2.75g fat, 2.33g saturated fat, 265.5mg sodium, 16.7mg potassium, 33g carbs, and .83g protein. (4 Points Plus) You are saving 17.5 calories per serving in eggs and a whopping 82.5 calories per serving by eliminating the 1/2 c of canola oil.  That's exactly 100 calories less per serving, and that is quite significant in my book.  And absolutely NONE of the taste was sacrificed for the changes.

On top of that, cake normally has a frosting.  I don't know what you get, but I always get Pillsbury Chocolate Fudge Funfetti.  But per 2 Tbsp that crap has 150 calories, 6g fat, and an additional 23g carbs!  So if you do the math, a "typical" piece of cake with frosting on it is normally like 410 calories and 56g carbs!  With this diet soda cake and whipped topping you are saving about 230 calories per serving.  Amazing, huh?  I'd say with the great taste and better nutritional values, this is definitely a SCORE

If you are celebrating a birthday or other special occasion, go ahead and have a piece of this cake with a little whipped topping.  Just don't say everyday is a celebration! lol

A BIG thank you to Tawnya M. for bringing this recipe to my attention!!!

UPDATE:  I mixed in a little of the lemony cream to the plain lite whipped cream, and the flavor is much more pleasant than the straight lemon cream.  It adds just a little zing and zest without being overpowering.  Just start off with a little...maybe 1 part lemon cream to 3 parts lite whipped cream.  That's a guesstimate.  Taste it a little at a time as you go along until it's to your preference.  So, the "Low-Sugar Whipped Topping" was not a total failure after all.  It just needs to be modified from it's original version.  So if you used maybe 1 Tbsp of lemon cream to 3 Tbsp of lite whipped cream you would add 15 calories, 2.7g carbs and .75g protein to the total dessert.  Yes, I just now went and tried those measurements and it tastes good.  Just right, I think.  So, go ahead and make the "Low-Sugar Whipped Topping" after all!  It adds a nice little flair to the whipped cream.

ANOTHER UPDATE:  Matthew just came home from school and had a piece of cake with the mixture of lemon cream and lite whipped cream, and he devoured it!  It passed the 12 year old taste test!

If you would like to leave a comment here, it's so nice to get them and know someone out there is actually reading what I have to share. :)  Or, if you'd like to drop me a line you can always reach  me at happyfairylove@live.com.

Happy Celebrations!
Lisa


Friday, August 24, 2012

Not Our Odinary Chicken (Recipe, Pics and Review)

Last week you may remember that I decided to try at least one new "out of the box" (for me) dinner each week, take pics and post it for you all.  I went way out on a limb this week and tried a very new ingredient for my family...eggplant.  I have never made eggplant, and my kids have never eaten it before.  Don't click away yet!  Keep reading...

I got this recipe once again from dLife, but I changed it a little bit.  I changed an ingredient and changed some of the measurements.  I don't know about you, but my family likes a "hearty" meal.  I realize that I am cooking healthier, but that doesn't mean we have to eat like birds and still feel hungry when we're done.  And if you're increasing the right things, it's not going to be bad for you.

Here are the ingredients for Chicken Eggplant Casserole (serves 8):

1 1/2 - 2 eggplants (I used about 14 oz total), peeled, cut into 12-14 slices (I cut mine about 1/4" thick)
Cooking spray
4 Tbsp Parmesan Romano or Asiago cheese, fresh (I used a container of Buitoni brand)
3/4 tsp garlic powder (or 1 to 2 cloves minced garlic)
1 lb boneless, skinless chicken breast, cut into small pieces
2 - 14 1/2 oz cans Italian Seasoned diced tomatoes (drain about 1/2 the juice)
1 cup chopped bell peppers
1 medium onion chopped
3/4 C chopped up mushroom slices
3/4 tsp Italian seasoning
1/4 tsp black pepper
1 C mozzarella cheese (use reduced fat to lower calories and fat of recipe), shredded

Directions:
Prepare Eggplant Slices
1.  Preheat oven to broil.
2.  Arrange eggplant slices in a single layer on a non-stick baking sheet.  Mist with cooking spray.
3.  Place in oven about 4 inches from the heat and bake for about 2 minutes.
4.  Turn over eggplant, mist with cooking spray again, and top this side of the eggplant with the Parmesan Romano cheese.  Broil for 1 minute, or until golden. Set aside.

Prepare Filling
5.  Heat a non stick skillet sprayed with cooking spray over medium high heat for 1 minute.  Add the chicken pieces and cook, stirring frequently for 5 minutes, or until no longer pink.
6.  Add the tomatoes (with 1/2 the juice), onion, bell pepper, mushrooms, Italian seasoning, garlic powder and black pepper.  Bring to a boil.  Reduce heat to low and simmer for 5 minutes.

Preheat oven to 375F
Assemble Casserole
7.  Spray a baking dish with cooking spray.  Arrange half the eggplant slices on the bottom of the dish.  Cover with all of the chicken and tomato mixture.  Arrange the other half of the eggplant slices over the top.  Sprinkle the mozzarella cheese on top.
8.  Cover with foil and bake for 30 minutes.  (I did not have foil, and so I don't know what it's supposed to turn out like with the dish covered, but uncovered it still seemed to turn out fine.)
When I made this dish, the directions said not to drain the juice from the tomatoes.  But, when I served it, there ended up being a lot of extra liquid running on the plate and it wasn't attractive.  I'm not sure what the purpose of having all that juice in there would be, so I thought it would be best to drain at least one can of the tomatoes.  So, my plate was not pretty.  I'm showing you a pic of Sami's vegetarian version because it looks nicer.  Instead of dumping all the ingredients right in the pan with the chicken, I put the tomatoes, vegetables, and seasonings in a bowl and stirred it up.  Then I scooped a little of it out and put it in a separate pan with her fake chicken.  Then I dumped the bowl into the pan with the real chicken.  So, when I scooped out some of the mixture for her plate, I didn't get much juice in the scoop, and her plate looked much nicer than mine did.
I would like to add that I think this dish would be good served with some brown rice or quinoa cooked in chicken broth.

Now, for the taste test results of my guinea pig family.  They are such good sports!  They all balked at the thought of eating *gasp* eggplant.  Like I said, this is completely new to them.  It was a little funny when they asked how they were supposed to eat it, and I had to demonstrate to them how to cut a piece off with my fork.  Matthew (12) and Sami (16, vegetarian) both really liked it.  Sami was very interested in the healthfulness of the dish.  I guess she thought since it tasted so good and "hearty" that it must be bad for you.  Wrong!  This dish is VERY healthy.  Sara (10) tasted but did not care for the eggplant.  But she devoured the chicken and tomato filling, so it was still a win in my book.  At least she tried the eggplant.  When I was her age I didn't like it either, but I really enjoyed it this time around.  I also didn't cut my eggplant slices very thick so as to not overwhelm everyone on their first try of it.  Jeff gave it a thumb's up, and really dove into his.  He had seconds.  Again tonight there were no leftovers.  Score!  I think overall it was a success and everyone in the family would like to have it again.

On to the nutritional values.  If you search through the ginormous database of recipes on dLife and happen to find this one, you will notice that my nutritional values are different from theirs.  As I mentioned in the beginning, I changed some of the amounts of the ingredients which will alter the nutritional numbers per serving.  As I have written the instructions here, it serves 8:

188.8 Calories, 5.9g fat, 2.6g saturated fat, .18g polyunsaturated fat, .23g monounsaturated fat, 58mg cholesterol, 354mg sodium, 189mg potassium, 10g carbs, 2.5g fiber, 24g protein.  (5 Points Plus) What a healthy dinner!!!  And, as I said above, with these kinds of numbers it would be perfectly acceptable to add some brown rice or quinoa on the side.

My family and I recommend Chicken Eggplant Casserole.  It has a wonderful Italian flavor and aroma and it is also hearty.  I think you will enjoy it!  If you decide to try it, let me know how you and your family like it.  You can leave a comment here or you can always drop me a line at happyfairylove@live.com.

Blissful Eating Everyone!
Lisa

Monday, August 20, 2012

Strawberry Dream Mousse (Recipe and Review)

Wow, what a sweet treat this was!  I found a recipe on dLife called "Raspberry Dream Mousse", and I changed it just a little.  Primarily, I substituted strawberries for the raspberries.  Also, it called for the use of fresh fruit and ice cubes.  I saved a step and used frozen fruit.  Here are the ingredients I used (I doubled the recipe listed on dLife):

1 - .6 oz sugar free strawberry gelatin (dry mix, large box)
1 C cold water
1 - 1 lb package frozen strawberries
1 - 3.2 oz package powdered milk
It is super easy to make!

1.  In a sauce pan combine gelatin and water.  Stir well.  Let stand for 1 minute.
2.  Place pan over low heat.  Cook for just 1 minute or until gelatin is dissolved, stirring constantly.
3.  In a blender combine gelatin mixture, frozen fruit and powdered milk. (I added the strawberries maybe 3 or 4 at a time.) Cover and blend until smooth.
4.  Spoon mousse into parfait glasses and serve.

Easy!  I don't have parfait glasses, so all I had to use was little coffee cups.  lol.  I'm so unfancy at my house.
I used a 1/2 C measuring cup and put one 1/2 C scoop in each glass.  I got 6 servings with just a smidge to spare.  Perfect for your "little taste" before the company comes. ;) It would look really wonderful scooped out nicely into martini glasses (or something similar) with a few slices of fresh strawberries on top for garnish.  But, like I said, I'm not fancy and don't have such things, and this was just for my kids...they don't need fancy. lol

The texture is very thick, smooth and creamy.  It is fantastically sweet, and a little will go a long way.  My kids ate half and put the rest in the fridge for later.  I, on the other hand, ate it all.  :)  But that's ok, because the nutritional values are exceptional.  Here's the info (for the amounts and brands shown divided into 6 servings):

91.7 calories, 156.7mg sodium, 260mg potassium, 14.5g carbs, 1g fiber, 7.2g protein.  (2 Points Plus.)  This is a perfect fruit-i-liciously refreshing treat.  I highly recommend trying it.  Sooo easy to make, and simply scrumptious to eat.  My kids definitely want this again, and, if I'm ever social enough to have dinner guests, I think I might make this for dessert.  (Maybe I'll get some nicer glasses.)  I'm not sure how well it keeps in the fridge.  Since the kids put theirs in there I'll check on it every so often to see how it's holding up. (Update:  It's now the next morning, and I checked again on the cups the kids left in the fridge.  The mousse is still holding up just fine.  And if they don't wake up and eat it soon, it just may accidentally disappear! :)

Let me know if you try it.  Going to substitute different fruits?  Let me know here what you use and how it turns out.  As always, you can drop me a line at happyfairylove@live.com.

Merry Desserts!
Lisa
P.S.  I don't know how to get others to see my new blog except to ask you lovely few people who do read it to share it, either on Facebook, Twitter or your own blog.  Do you know anyone who may be interested in a healthier eating plan?  Please let them know about Losing Weight Along the Way.  Thanks so much!


Friday, August 17, 2012

What's For Dinner!? (Recipe, Pics and Review)

Since I began this journey I have been trying hard to find good recipes that will fit within the constraints of my family.  1)  Healthy enough for me to eat; 2) A healthier choice that is tasty enough for the rest of my family to eat; 3) Easily converted to vegetarian for my teenage daughter to eat.  It is daunting, believe me!  I have noticed, though, that I tend to the same types of flavors and foods all the time.  I never really venture out of my comfort zone.  I have made it my personal challenge since starting this blog to try at least one new main dish per week that is not something I would normally make or eat.

We eat a lot of chicken.  It's easy to cook, very versatile and I can easily substitute real chicken for Quorn brand vegetarian meatless meat for my daughter, Sami.  (If you've never tried Quorn brand products, they are fabulous!  They contain no soy and have a taste and texture very similar to real meat.  No funny after tastes!)  And I have never been able to cook beef very well.  I don't know why.  It just doesn't agree with me.  Maybe I will get brave and try again sometime soon.

I found a recipe on dLife that I decided to try this week.  Although it is chicken, it has flavors I am not accustomed to with meat.  I decided to make Honey Pecan Crusted Chicken.  Here are the ingredients:

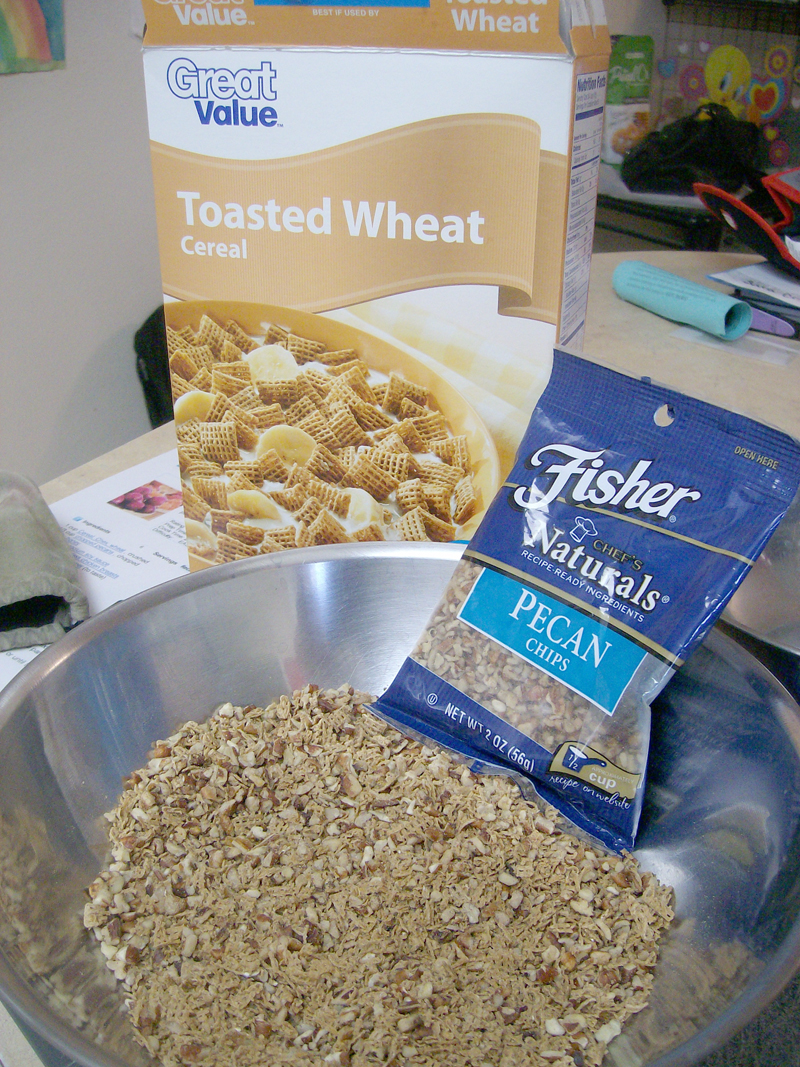
1 cup Wheat Chex cereal, crushed
1/3 cup chopped pecans
2 Tbsp honey
2 Tbsp soy sauce
6 medium sized chicken breasts, boneless, skinless

Easy ingredient list, don't you think?  That's the way I like it...simple!!!

1.  Preheat oven to 425F.
2.  Cover a baking sheet with foil and spray with cooking spray.  I really recommend you don't skip this step.  I didn't have any foil in my cupboard tonight, so I just sprayed the dish, and the honey drippings really baked on to the bottom.  It'll take some soaking to get that up.
3.  Crush up the cereal in a bowl (I used the flat bottom of the measuring cup to crush it and it worked well enough.  Otherwise you could use a processor.)  Mix the cereal and the pecans in a bowl.
4.  In another bowl mix together the soy sauce and honey.
5.  Personally, I like my chicken in smaller, uniformly sized pieces because they bake quicker, easier and tend to stay moister throughout.  So I cut my chicken breasts in half lengh-wise.
6.  Dip the chicken in the soy sauce and honey mixture, then roll in cereal and pecan mixture to coat the chicken.  Place in pan.

7.  I baked mine for about 30 minutes.  To check your chicken, use a meat thermometer, or I just cut a piece open at the thickest spot and check to make sure there is no pink and it is cooked through before I take it out of the oven.

Serve!  How easy is that???!!!  I served mine with asparagus and brown rice.  For this recipe I figured the nutritional info for a 4oz piece of cooked chicken, but the piece in the pic was smaller than that.  Here's a pic of the meal all done.
Here is the nutritional information for a 4 oz. piece of chicken with the honey/pecan coating:  323 calories, 5.6g fat, .4g saturated fat, 452mg sodium (I did not use a low sodium soy sauce.  You can reduce this number by choosing that option.), 14.8g carbs, 1.6g fiber, and 36g protein.  (6 Points Plus.)  Since it is so good on carbs, you can easily add 1/2 cup brown rice to the equation.  The asparagus was a nice choice, too.  With five small asparagus spears and 1/2 cup of brown rice you will be looking at an additional:  99 calories, 1.8g fat, 138mg sodium, 17.9g carbs, 2.2g fiber, and 3.4g protein.

Now, if you go to dLife and look for this recipe and happen to find it in the thousands upon thousands of recipes they have, their nutritional info was VERY different from mine.  They did not specify how many ounces of chicken they were considering to be a serving.  They claimed there's only 5.3g of carbs, but just the 1 cup of cereal has 48.8g carbs, which when divided by 6 servings right there comes out to 8.13g carbs.  Also, they claim a serving is only 191.8 calories.  That's ludicrous because just 4 oz of chicken alone has 184 calories, and 1 cup of chex has 33.3 calories per serving in this dish (200 calories divided by 6 servings).  That right there, not including the honey or pecans is 217.3 calories. So it totally didn't make any sense to me.  I calculated each ingredient, added them all up and divided the total number by 6 to come up with my numbers.  I think mine are fairly accurate.

On to the review.  I waited, holding my breath, for each of my kids to take a bite.  Well, first off, I had to tell Sami that I kind of messed her vegetarian version up.  When I mixed the soy sauce and honey, I had exactly 2 Tbsp of honey in the jar.  When I have to dip and coat meat I always do hers first, so i don't "contaminate" her vegetarian food with any meat juices.  (I spoil her!)  Well, I forgot.  I didn't dip hers.  And, I drizzled the remaining liquid on top of the chicken so I had none left for hers.  Oy.  I put the honey bear in the microwave and heated it for 20 seconds.  I was able to get a little bit of honey out of it, but not very much.  I had to improvise.  I sprinkled just a smidge of brown sugar on top of her piece so the sweetness of the sugar would offset the saltiness of the soy.  Since she had never had the "correct" version, she didn't know any better and still liked it.  In fact, ALL the kids said right away how good it was.  Score!!!  It was VERY tasty!  It was lightly sweet and just a bit salty, and the crunchiness of the coating was great.  My husband said, "Well, it's different."  And I was like, "But do you like it?"  He said he did and he must have because he had about 4 strips of chicken himself.

Sara (my 10 year old) said, "Can we have this again?" after she had about 3 bites.  Matthew (my 12 year old) had seconds.  Sami ate all of her "messed up" piece.  There were no leftovers of anything tonight.  That's really a win, because it seems that leftovers never get eaten in our house and end up in the trash.

My family and I highly recommend this dish.  Let me know if you try it and what you think of it.  Leave a comment here or drop me a line at happyfairylove@live.com.

Have a lovely dinner!
Lisa