Wednesday, November 28, 2012

Some product reviews and how I used them for a great breakfast

I was talking to my nutritionist the other day, and since I was having problems with getting hungry too quickly after breakfast she suggested I have more protein in the morning.  She said Egg McMuffins are a great breakfast.  I don't like eating at McDonald's even occasionally, so I'm definitely not going to spend the money to go there every morning.  I decided to make my own version at home, and this is what I used:

1.  Thomas' Hearty Multi Grain English Muffins
Just 100 calories, a big 8g of fiber and 5g of protein per muffin.
2.  My new favorite find...Hormel Natural Choice deli meats in the cold cut section of the grocery store.  They taste like actual ham and turkey and have NO ADDED NITRATES OR NITRITES!
Just a little on the pricey side, but so worth the cost!
3.  1 Egg
4.  1 slice Sargento Ultra Thin Provolone cheese.  Only 40 calories per slice!!!  They are creamy when melted onto the egg muffin, and packed full of flavor for such a thin slice of cheese.
I used Provolone, but it also comes in Swiss, Cheddar and some others.
5.  2 tsp of butter.

I'm sure you can figure out how to cook it, but I like adding pics to my posts. :)  Spray the pan with a little bit of pan spray.  Put the burner on medium heat.  Crack the egg into the pan and break the yolk with a fork (but don't scramble it).
Add a little pepper and salt if you like a pinch of salt.  While that is cooking, split the English muffin with a fork and toast them.  Spread 1 tsp of butter on each side after toasted. 

Add 2 slices of Hormel Natural Choice honey ham into the pan.  Flip the egg.  Flip the ham.

Put 1 slice of Ultra Thin Provolone (or flavor of your choice) onto 1 side of the English muffin.  To make the egg fit nicely onto the muffin I cut it into halves or thirds and stack it a little, just covering the area of the muffin.  Add ham.  Eat and enjoy.
This is my and my kids' new favorite breakfast.  It's got a good amount of protein, fiber, not bad on carbs and good on calories for a small meal.  Here are the stats:

291.2 calories, 14.4g fat, 4.75g sat fat, 2.3g polyunsaturated fat, .99g monounsaturated fat, 208mg cholesterol, 780mg sodium, 70mg potassium, 27.8g carbs, 8g fiber, 18.7g protein.

It keeps my feeling full and satisfied all the way up until lunch time.  I have to admit, they are so tasty that it's tempting to have another one, but I don't allow myself to do that.  That would kind of defeat the purpose of being healthy, wouldn't it? :)

Enjoy your breakfast and have a happy day!
Lisa
PS  Hover over the black bar on the right side of the screen to pull out more  menu options for my blog.
happyfairylove@live.com


Sunday, November 4, 2012

Crock Pot Beef with Broccoli and a Vegetarian Version

I sure have been using my crock pot a lot lately.  It's a pain in the butt to clean the huge, heavy ceramic pot that goes in it.  So worth the effort though.  Keeps the kitchen much cooler, the house smells wonderful all day long, its almost effortless, and the meat is always perfect.

I'd like to share this recipe with you that I found on dLife.  My husband thought it had a hint of an Asian taste to it, and he would be right because it has a little ginger in it.  It's not overwhelming...just a hint and a nice change up for a standard crock pot roast.

Here's what you need:

1 1/2 - 3 lb beef roast, lean, cut into a couple pieces
3/4 lb carrots, peeled and in pieces
2 medium onions, cut into wedges
1 Tbsp fresh ginger root, finely grated or minced
2 medium garlic cloves, minced
1/2 C water
2 Tbsp soy sauce (low sodium is better)
1 packet dry beef gravy mix (I actually used mushroom gravy)
4 C fresh broccoli florets

1.  Place carrots, onions, meat ginger and garlic in a large slow cooker.
2.  In a small bowl combine water, soy sauce and beef gravy mix.  Pour over meat.
3.  Cover and cook on low heat for 8-10 hours or on high heat for 4 to 5 hours (mine took about 6 hours to get really tender, so just check it.)
4.  Then put the cooker on high, put in broccoli.  Cover and cook for 15 more minutes until broccoli is crisp-tender.

It was really delicious.  The meat was melt-in-your-mouth tender, the vegetables were perfectly cooked.  My roast today was not very lean, and the crock pot completely filled with fat/juice when it was done cooking.  So I'm thinking that if it was a very lean piece of meat the gravy sauce would be thicker.

I'm a little unsure of the nutritional stats because I think it all depends on your specific cut of meat.  For a 4 oz serving of meat with carrots and broccoli, it will be approximately 300 calories, 700mg potassium, 600mg sodium, 20g carbs and 35g protein.

Also, whenever I made anything like a beef roast before my vegetarian daughter was completely out of luck because I did not have any suitable vegetarian products that I could convert the recipe to.  Until now.  I found a new product that I am totally excited about.  It's been around for a while, but it is really hard to find.  I found just a couple different items at Safeway.  You can go to Gardein's website and look at there store finder, although I will warn you, it was not accurate for me.  They listed several stores that did not carry it.  You'll just have to look around.  I found these "beefless tips":

It was enough to make 2 single serving meals, and it was under $4.  Such a bargain.  Sami is so excited now that she can have pot roast again.  Here's what hers looked like:
I steamed the vegetables, mixed them in with gravy, heated up the "meat" and then stirred it all together.  So easy, and she was in Heaven.

Hope you enjoy your Beef with Broccoli stew!
Lisa
PS Hover over the black bar on the right side of the screen to pull out more menu options for my blog, such as the one to follow my blog, the blog archives and also the search form.
happyfairylove@live.com


Monday, October 29, 2012

Healthier Home Made Taco Seasoning (No chemicals!)

I make a lot of Mexican food at my house.  One of the staples I am always buying at the grocery store is those little packets of taco seasoning for things like my Scrumptious Quesadillas and Tex Mex Chicken & Rice.  I am going to have to go back and amend those recipes to include today's easy home made fix, your own Taco Seasoning from the spices in your cupboard.

I saw the original recipe on Pinterest, and I made it and it was pretty good, but something was a little off.  I tasted a packet of store bought seasoning and right away I could tell that it was the salt.  Now, if you are watching your sodium, by all means, leave out the salt I put in here.  But if a little bit doesn't bother you, I think it does make a difference in the taste.

Here's what you need:

1 Tbsp Garlic Powder
1 Tbsp Onion Powder
1 Tbsp Cumin
1 Tbsp Chili Powder
1/4 tsp crushed red pepper
1/4 tsp ground red pepper
1/2 tsp salt

This will make slightly more than a store bought packet.  A store bought packet has 4 Tbsp (6 servings of 2 tsp) and this recipe has 5 Tbsp (about 7 servings of 2 tsp).  It tastes very much like the store bought version, but if you compare the two you'll notice that this recipe does not make a toxic orange colored seasoning mix.  Nor does the home made version contain any Silica.  Do you know what silica is?  The seasoning packet says it's to prevent clumping, but if you look inside the box of a new pair of shoes or inside a new purse you'll find a little packet that says, "Do Not Eat".  That, my friends, is silica.  If we're not supposed to eat it, what the heck is it doing in taco seasoning?!?

The home made version also has 1/2 the sodium as the store bought kind.  Here is the nutritional information for about 2 tsp:  13.2 calories, 182mg sodium (which can be reduced to just 13.5mg if you eliminate the added salt), 2.5g carbs, .6g fiber and .5g protein.  A regular packet contains 420mg sodium per 2 tsp! 

It's so easy, and I'm sure you have most, if not all, the spices already.  I used an empty bottle of garlic powder, peeled off the label and printed a new label, which I taped on.  Also, I took a Sharpie and wrote the recipe for the mix on the back of the bottle so it will be easy easy easy to see it and mix up another batch.

Get Cookin'!
Lisa
PS  Hover over the black bar on the right side of the screen to pull out more menu options for my blog, like signing up to follow my blog, search key words and also a blog archive.
happyfairylove@live.com

Tuesday, October 23, 2012

Rich, Thick, Creamy and Guilt-Free Chocolate Frosting

You might have read my post the other day when I finally came up with, imo, the best "diet" frosting out there.  You would never ever know it was low cal/low carb.  If you want to check it out, click here.

My mission today was to make a chocolate frosting that is just as good as its vanilla counterpart.  I think I came up with a good one.  Here's what you need:
Oops!  I forgot the Stevia...don't forget the Stevia!
1 small box instant sugar free chocolate pudding mix
1 C 1% milk
2 C lite whipped cream
1 Tbsp unsweetened cocoa powder
1 1/2 Tbsp Stevia

Mix together pudding mix, milk, cocoa powder and Stevia.  Whip until it's thick.  Mix in the whipped cream until well blended, smooth and creamy.  That's it!


The recipe will cover one 9x13 cake, and 1 serving is 3 Tablespoons.  For each serving there are:  35 calories, 5.3g carbs and 1.4g protein.  Pretty dang good compared to a store bought canister of Betty Crocker or Pillsbury frosting.  Cover and keep in the refrigerator.

My family really likes it a lot, and I hope yours will too!

Until next time,
Lisa
PS  Hover over the black bar on the right side of the screen to pull out more menu options for my blog, like the tab to follow me and the tab to search past posts with lots more great healthy recipes.
happyfairylove@live.com


Saturday, October 20, 2012

Perfect Thick and Rich Vanilla Frosting That's Low Cal But You'd Never Know It

Eureka!!!  I am so excited!  If you've been reading my blog you know that I have a thing for the diet soda cakes (here and here) and that I've been having a hard time finding a recipe anywhere that was a suitable replacement for plain vanilla frosting.  I have been unsuccessful.  Nothing has worked out very well.

What's the solution when you can't find a suitable recipe?  Make one yourself, of course!  So I created my own concoction that is thick enough, has a great vanilla flavor and is creamy and decadently delicious.  And, it's super easy peasy!  (You know I like that part!)  All you need is:
Oops!  Don't forget the vanilla!
1 small box instant sugar free vanilla pudding mix (see *note)
2 C lite whipped cream
1 C 1% milk
1/2 tsp vanilla

*Note:  I used Wal-Mart brand sugar free french vanilla instant pudding mix, and I really like the flavor it has.  I also made a batch using Jell-O brand sugar free fat free vanilla instant pudding mix, and it was a little less vibrant.  If you use a plain vanilla flavor you might consider adding a Tablespoon of Stevia to the mix to give it a little sweet spring in its step.

All you do is mix the milk, vanilla and pudding mix together until it gets thick.  Then whisk in the whipped cream until it is well blended and creamy.

This frosting is different from other pudding frostings I have found because the trick that I came up with is using less milk than the box calls for and adding a splash of vanilla.  When you make the pudding by the box directions, the frosting does not have the right consistency or texture.  I decided to make the pudding thicker by adding in less milk and then finding just the right amount of whipped cream to get the right balance between thickness, fluffiness, taste and texture.  And I did it!

On top of that, it makes an amazing fruit dip!!! (click on pic for a larger view)

The best part?  The nutritional stats!  This recipe will frost one 9x13 cake.  For a 3 Tablespoon serving there are only 32 calories!!!  Can you believe that?!  Compare that to just 2 Tablespoons of Betty Crocker Vanilla Frosting.  That has 140 calories---over 100 more calories than my recipe.  Isn't that amazing?  My frosting has just 5g carbs per 3 Tablespoon serving.   Betty Crocker has 23g carbs per serving of only 2 Tablespoons.  I think it's pretty obvious the benefits in nutrition my recipe has over store bought frosting.

As I've mentioned, I've experimented with quite a few frosting recipes and mixtures.  My oldest daughter, 17, is quite finicky.  She has not liked a single one of them, and has been preferring to have her cake naked rather than have any topping.  Well, she tasted this one and exclaimed, "Delicioso!" and gave me a big thumbs up.  Woohoo!  And, I served it to one of my husband's friends last night and he thought it was excellent too.  This one definitely passes muster for imitation vanilla frosting.  You've really got try this one!  (Cover and keep in the refrigerator.)

Happy Indulgence (but don't go overboard!)
Lisa
PS Hover over the black bar on the right side of the screen to pull out more menu options, like the one to follow my blog or to search previous posts for more great healthy recipes.
happyfairylove@live.com

Thursday, October 18, 2012

Home Made Ranch Dressing, Low Cal / Full Flavor

When I first started my "live-it" I ate a salad every day for lunch.  I always had Ken's Lite Creamy Caesar, and I thought it was really great at 45 calories per tablespoon.  But, you need way more than 1 tablespoon for a big salad.  So I had 3 tablespoons, and then the calories really started adding up.  I got away from eating salads because of it.  Now salads can come back into my days because I discovered and modified a recipe for ranch dressing with JUST 8 CALORIES per tablespoon!!!  Yes, that is correct.  8 Calories.

I originally saw a recipe on Pinterest, and I decided to try it.  The main ingredient for the base is Dannon 0% fat Oikos plain Greek yogurt.  I don't really know what caught my eye about this, because I really do not like the taste of Greek yogurt at all.  Made it anyways.  The end result was what I should have expected to begin with.  It had a VERY sharp, almost sour taste to it from the yogurt.  It was not very good.

So in my refrigerator was sitting a big jar of ranch dressing that I just knew was going to go to waste, and I thought what a waste of money.  That's one of the pitfalls of trying so many new things.  Sometimes you invest a lot of time and money into these recipes and they turn out to be kind of horrible.  It was really bothering me all night long, even as I tried to go to sleep.  Then it dawned on me.  In order to counter-act the flavor of the Greek yogurt, I needed to just find something to balance it out.  Finally, at about 1:30 this morning I couldn't stand it any longer, and I just had to get up and tweak that jar of ranch.  I added Lite Sour Cream to the mix, and guess what!  It worked!  Now I have a jar of ranch dressing that is just the right balance with a hint of tanginess, a lot of creaminess, full of flavor, and only 8 calories per tablespoon.  It's a cinch to whip up a batch, so you really should try it.  All you need is:

1 single serving size container of Dannon Oikos no fat Plain Greek Yogurt
3/4 C Lite Sour Cream
3/4 C 1% Milk
1 Packet Hidden Valley Ranch Dressing Mix (NOT the buttermilk kind...the original kind)

Whisk everything together in a bowl, poor into a mason jar or other container with a lid and refrigerate.  You should let it chill for at least an hour to let the flavors really blend together.

It does need to stay refrigerated, too.  I got my Kerr self-sealing mason jar at the dollar store.  I don't know how much they are at the grocery store or Wal-Mart.  I'll have to check it out. 

It makes 2 1/2 Cups of dressing and the nutritional information for 1 tablespoon is:  8 calories, .6g fat, .4g saturated fat, 2.7mg cholesterol, 63.5mg sodium, 11.5mg potassium, 3.8g carbs and .75g protein.

Sara was still awake this morning when I changed the recipe (it's fall break and she thinks she needs to stay up all night).  She tasted it and immediately got some in a bowl, sliced up some cucumber and had a late night snack.  I've been looking forward to having my salad all night long.  Is 7:30 a.m. too early for some leafy greens with creamy ranch? lol

Enjoy your rabbit food!
Lisa
PS  Hover over the black bar on the right side of the screen to pull out more menu options for my blog, like the tab to click to follow my blog, or the keyword cloud to find other recipes and posts.
happyfairylove@live.com

Sunday, October 14, 2012

Skinnier Cream Cheese Frosting for a Diet Soda Carrot Cake (or whatever kind of cake you want)

I've been making the diet soda cakes quite a lot.  In case you missed that post, click here to see it.  I've done some experimenting since that post.  I've made chocolate cakes with diet Dr. Pepper and diet Cherry Coke.  imo, I don't think it matters what type of diet soda you use, because really I can't taste any difference.  But I've also experimented with the flavors of cake mix, too.  I made a cherry chip cake and yesterday I made a carrot cake.

But, they were always naked (except the first one that I linked you to with the lemony cream topping birthday cake).  I searched and searched for some better recipes for low calorie/low carb frostings, but I couldn't really find any.  I experimented with some chocolate recipes, and they were horrible!!!  Definitely not something I would share here.

Then the other day I got a Hungry Girl email that was all about frostings.  So, I decided to try one of them but instead of Splenda I used Stevia, and less of it.  Here's what you need:
3 Tbsp sugar free vanilla instant pudding
2 1/2 Tbsp Stevia
1/2 tsp vanilla extract
1 1/2 C lite whipped cream
3/4 C fat free cream cheese, room temperature

It's pretty easy to whip some up, too.
1.  In a medium bowl combine pudding mix, Stevia, and vanilla with 3 Tbsp cold water and mix well until smooth and thick.

2.  Add in cream cheese and mix well, incorporating the vanilla in with the cream cheese until it is really combined.  It really does make a difference that the cream cheese is room temperature.  It blends much better and easier. 

3.  Add cool whip.  The original directions said to "stir until smooth", but when I just stirred and folded it, the cream cheese/pudding mixture stayed in clumps throughout the whipped cream.
(it's kind of hard to see, but click on it to enlarge it and you'll see what I'm talking about.)  So, I used my hand mixer on low speed with the whisk attachment on it instead of the beaters.  But I'm sure the beaters would work just as well.  Now, the whipped cream with be less fluffy from beating it together with the cream cheese, but I think the end product is much better this way rather than clumps of cream cheese and pudding.  It looked like curdled milk, and it just wasn't appetizing.  Here's what mine looked like after I used the mixer...
And here's what it looked like on top of a delicious piece of carrot cake...

The numbers on this cream cheese frosting are incredible!  This recipe is enough to frost one 9x13 cake, and I cut the cake into 12 servings.  So, for 1/12 there are only 28.3 calories and 3.5g carbs!  Fantastic!  The cake itself has 133 calories and 33g carbs per piece.  Not bad for an occasional dessert, treat or celebration!

The frosting is so much more subtle than store bought full fat and sugar cream cheese frostings you find on carrot cakes.  They are so heavy and overly sweet.  This recipe is lighter, creamier, and not as tooth-aching sweet as those.  It's mild, you can taste the cream cheese and it has just the right amount of sweetness between the Stevia and whipped cream.  And, imo, it tastes even better after it has been covered and refrigerated for a little while.

Hope you enjoy it!
Lisa
PS  Hover over the black bar on the right side of the screen to pull out more menu options for my blog, like the one to follow my blog.
happyfairylove@live.com


Thursday, October 11, 2012

Hearty Vegetarian Chili

My family loves chili, and we have it often.  It is relatively inexpensive, easy to make and very filling...all good things when planning my weekly dinner menu.  I got a little tired of the way I normally make chili.  Also, I have to make 2 pots, one big for the meat-eaters and one small for my vegetarian.  That gets kind of old, so I decided to make it with a few twists and tweaks to update it and bring it more to life.

It's very easy.  Here's what you need:

1 28 oz can diced tomatoes
1 15.25oz can black beans
1 16 oz can kidney beans
1 15.5 oz can navy beans (or white beans)
1 15.25 oz can of corn
1 tsp garlic powder
1/2 tsp ground red pepper (cayenne)
1 jalapeno, seeded and finely chopped (or 1 small can diced jalapenos, hot; you might start off with 1/2 can and then add more to taste)
1/2 onion, chopped
1 Tbsp canola oil
1/2 Tbsp tomato paste
1 packet chili seasoning, hot or mild to taste
1 1/2 C water
a little salt and pepper to taste

It seems like a long list, but it's half canned stuff, and the rest is very basic that you probably have on hand.  I don't know if the tomato paste changed the flavor that much or not.  You can make that optional.  I haven't worked with tomato paste enough to know how much to use and when.  I just thought it might give the diced tomatoes more of a prominent flavor in the mix.

1.  Heat the oil in a pot over medium high heat.
2.  Cook the onions until they are starting to get golden.
3.  Add in the jalapenos and cook just a little more.
4.  Add in the tomato paste and diced tomatoes.
5.  Add in the garlic powder, ground red pepper and chili seasoning.  Mix well.
6.  Add 1 1/2 C water.  Stir it up.
7.  Add in all the beans and corn.  Mix well.
8.  Cover and heat over medium heat until heated through.  If there is too much water for your liking, just take off the lid and cook it for a while, letting it evaporate.  Conversely, add more if you need it.

I served mine topped with shredded cheese and a little dollop of sour cream, and there was cornbread, too.  Those toppings and bread add a lot of calories and carbs quickly, so be careful on your portions.  It was so amazingly delicious.  It wasn't so far out there that it was weird, but it was enough of a change that it was a needed and welcomed change for the better.  I like this one way more than my old chili.  And, I only had to use one pot because it's already vegetarian.  I didn't miss the beef one little bit.  The beans and corn were so satisfying.  The jalapeno and ground red pepper gave it a little kick.  As for the onion and garlic...who doesn't like that combo??? 

My kids and husband loved it.  My husband said, "Now, you can make this again!"

There are about 10 servings of 1 cup, maybe a smidge more or less depending on the amount of water you use.  The nutritional values are really good for this too.  I thought the carb count would be a lot higher because of all the beans, but it was much better than I thought.  There are:  163 calories, 2.3g fat, 578.8mg sodium, 470mg potassium, 28g carbs, 8.9g fiber, 8.9g protein. (4 Points Plus)

I hope you enjoy this easy vegetarian chili recipe.  I think you'll like it!

Merry Eating!
Lisa
PS  Hover over the black bar on the right side of the screen to pull out more menu options for my blog, such as the tab to follow my blog (if you haven't already, your invitation is extended!).
happyfairylove@live.com

Saturday, October 6, 2012

3 Minute Prep Time Berry Medley Cobbler (recipe, pics)

It's been a few days since I posted anything new.  I've tried a few things, but they didn't quite work out.  Today's recipe was outstanding, though.  This will be a great treat for a holiday dinner dessert with family and friends, especially if served warm on a cold winter day.

I saw this recipe on Pinterest.  You can find me on Pinterest here and it was on my "Recipes That Sound Really Good" board.  This is as easy as the diet soda cake.  It basically is, but with a few minor tweaks.  Here's what you need:
Any clear diet soda will be good, like 7 up, Sprite or Sierra Mist.  Also, don't use this brand of cake.  It has a ton more calories and carbs than a Betty Crocker or Pillsbury white cake.

24 oz mixed frozen berries.  Try to get berries that are "no sugar added".
12 oz clear diet soda
1 white cake mix

Spread the berries in the bottom of a 9x13 cake pan.
Spread the cake mix over the top of the berries.  Try to break up the big lumps.  Then, pour the diet soda evenly over the cake mix, trying to cover all of the mix.
If there are big dry spots, you might want to gently stir the top around just a smidge to moisten it up a little.  I noticed when mine was cooking that there were some larger patches of plain cake mix that was still powdery.  When mine was almost done cooking I stirred (gently) the dry spots in with the berries a little better and then let it cook a little longer.

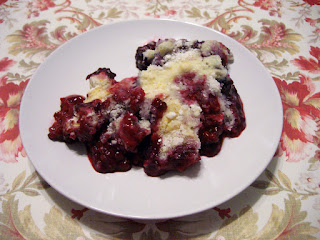
Cook at 350F for about 45 minutes.  The berries will be bubbly and the cake should be golden.  Here's what mine looked like, served up warm.
I figured the calories and everything for 1/12 of the cake as a serving.  The calories are depending on the brand of cake mix...I did not use the number for the brand shown.  I used the numbers from a Betty Crocker mix.  There are 163.3 calories, 1.25g fat, .8g saturated fat, 258.3mg sodium, 16.7mg potassium, 37.9g carbs, 3.4g fiber, .8g protein. (4 Points Plus)

This definitely passed the family taste test.  They all loved it warm.  Go ahead and try this one.  It's super easy, but if you don't tell your guests they'll think you spent a long time on it.  It's ok with me if people think I'm Captain Wonder-chef! lol

Eat Well,
Lisa
PS Hover over the black bar on the right side of the screen to pull out more menu options for my blog, like becoming a follower if you aren't already.  You are invited to join me! :)
happyfairylove@live.com


Wednesday, October 3, 2012

Mouth-Watering Crock Pot Beef & Barley Stew

I'm going to tell you right from the get-go.  This was an INCREDIBLE dinner!!!  It was so melt-in-your-mouth good I can't even wait to have some leftovers.  I don't make beef very often.  First, I never seem to cook it right and it ends up being tough.  Second, it's very expensive.  Since I cooked it in the crock pot, though, it was pretty fool-proof.  As for the cost, yes, a beef roast is pretty pricey.  But if you wait for your grocery store to have a sale on them you can get really good deals.  This roast cost $19.53 (yikes!!!) BUT it was a "buy one get one free" sale.  So, for two 3+ lb boneless beef roasts it cost me $9.77 and THAT is a GREAT deal.  Keep your eye on the weekly grocery store sale papers!

I originally found this recipe on dLife, but I made changes to it, as usual.  Here's what you need:

3 lb boneless sirloin tip roast
32 oz low sodium, low fat beef broth
14 1/2 oz canned diced tomatoes (not drained)
1 lb sliced carrots
2 medium onions, cut into wedges
1 C pearled barley
1 bay leaf
3 medium garlic cloves, minced
A little salt, maybe 1/2 tsp

As for the barley, I found mine in the bulk bins at Sprouts (farmer's market) and it was very inexpensive.  Here's what it looks like raw. 


I cut my roast into 3 pieces.  Then I just added everything to the crock pot, and I put the bay leaf on top so it would be easy to find and take out before serving...remember, you can't eat bay leaves.  The directions for the original recipe said to cook on low heat for 9 or 10 hours or on high heat for 4 1/2-5 1/2 hours.  I put mine on the low heat setting and it was fall apart tender in just 7 hours.  I guess maybe different crock pots cook differently.
This is what it looks like when you first put it in the pot.

When it was done cooking I took out the 3 pieces of beef, put it on a cutting board and shredded it up.  Then I put it back in the crock pot and stirred it all up.  I tell you, I couldn't even cut the meat; it was too soft.  It literally just feel apart under my fork.  Scrumptious!!!  I served it with a slice of sour dough bread, but you can omit that to save calories and carbs.

My whole family just completely loved this.  Sami, my vegetarian, missed out though.  I have some left overs, and I can't wait to dig it into it.  And, if you remember, I got 2 roasts for the price of 1, so I still have another roast in the freezer that I can make this again with.  This is going to be soooo good on a cold winter day.  So thick, hearty and filling.  It's stick-to-your-ribs good.  And I'm not exaggerating. 

This pot will serve about 12 with 1 C servings.  286 calories, 8g fat, 2.8g saturated fat, 66mg cholesterol, 314.6mg sodium, 297.5mg potassium, 22.5g carbs, 4.5g fiber, 30g protein. (7 Points Plus) This is really great on calories, carbs and protein.

This dish will be a crowd-pleaser, for sure.  Again, watch the sales in your grocer's meat department, and when you find a good deal on a boneless beef roast, pick one (or two) up.

Hearty Eating!
Lisa
PS Hover over the black bar on the right side of the screen to pull out more menu options for my blog.
happyfairylove@live.com
If you don't already follow my blog, I'd like to invite you to.  Just go to the bar on the right and pull out the Follow tab.


Monday, October 1, 2012

Nutty Quinoa (Recipe, pics)

Originally I found this recipe on dLife, but it was made with brown rice.  It was very good that way, and I'm sure I will make it again that way, but I decided to try it this time with quinoa instead.  Quinoa is awesome.  It's got a very plain flavor by itself, in my opinion, and it takes on the flavors of the things you cook it with.  For example, use chicken broth instead of water for a more flavorful dish.  You can use sweet ingredients, like apples and cinnamon, for a breakfast quinoa, too.  And it's very healthy.  It's got slightly more fat than brown rice, but it edges out brown rice in terms of fiber and protein.  Quinoa, a seed rather than a grain, has all essential amino acids in it for complete protein, whereas brown rice does not.  Both are good to have in your diet, but if you are vegetarian or vegan, quinoa is a good source to get complete proteins.

It's very easy to prepare.  Use 1 part quinoa to 1.5 parts liquid.  Put them both in a cold pot, bring to a boil and cover.  Simmer over low heat for 15 minutes, turn off the heat and let sit, covered, for 5 more minutes.  Super easy--nothing to it.  Quinoa will expand about 3 times during the cooking process.  This recipe uses 1 1/2 C quinoa and makes about 8 servings of 1/2 C each.  Also, I highly recommend buying your quinoa from the bulk bins at your local healthy food store like Sprouts.  It is a fraction of the cost of the prepackaged stuff.

Here's what you need:
Oops.  I didn't put the chicken broth, oil and red pepper flakes in the photo.  Where was my head at? :)
1 1/2 C quinoa
2 1/4 C chicken broth
2 C rough chopped broccoli slaw
4 Tbsp slivered almonds
1 tsp red pepper flakes (omit if you don't like a kick)
3 Tbsp sunflower seeds
2 Tbsp olive or canola oil
1 Tbsp dried parsley

1.  In a pot heat oil over medium high.  Add in broccoli slaw and cook 2 minutes.
2.  Add almonds, sunflower seeds and red pepper flakes and cook 2 minutes.  Put into a bowl and set aside.

3.  Put quinoa and broth in the pot over medium high heat and bring to a boil.
4.  Simmer over low heat for 15 minutes, covered.
5.  Take off lid, add back in the broccoli and nuts, stir, cover it back up and let sit (off the heat) for another 5 minutes.
6.  Stir in parsley flakes.
7.  Serve.

btw, you can always click on the photos for a larger view, too.

This is a very filling little side dish that is packed with nuttiness and great flavors.  I like the red pepper flakes, but my daughter thinks it's too spicy.  It's got great crunch to it.  I served it tonight with Chicken a la King over toast and it made a very healthy, protein rich dinner.

The nutritional info for a 1/2 C serving is:  207.7 calories, 7.9g fat, 1.4g saturated fat, 2.1g polyunsaturated fat, 1.5g monounsaturated fat, 183mg sodium, 235.9mg potassium, 24.9g carbs, 2.8g fiber, 7g protein.(5 Points Plus)

Healthfully yours,
Lisa
PS Hover over the black bar on the right side of the screen to pull out more menu options for my blog.
happyfairylove@live.com
Your comments are appreciated, and if you aren't already following I'd like to invite you to do so.  Just pull out the menu on the right for the follow tab.

Thursday, September 27, 2012

Healthified Mac & Cheese, with a Nutritious Surprise Inside (Recipe, pics)

If you have kids I'm almost positive you have at least one box of Mac & Cheese in your cupboard.  And even if you don't have kids there's still a good chance you have some hanging around.  After all, mac & cheese is an American staple.  But it's SO completely laden with calories and carbs, it's unreal.  I'm looking at a store brand box of the stuff and it has per 1/2 C serving 200 calories, 25.5g carbs and 270mg sodium.  Those numbers are pretty high, if you ask me.  Definitely higher than the recipe I'm going to give you.

There's a nutritious mystery ingredient wrapped up in this recipe, and if you don't tell the kids, they'll most likely never know the difference.

Here's what you need:

6.5 oz whole wheat elbow macaroni
8 oz fresh or frozen cauliflower
1/4 C Italian bread crumbs
4 Tbsp grated Parmesan cheese
8 oz shredded cheese, such as sharp cheddar or colby jack...whatever you like
4 oz fat free cream cheese
1/2 C 1% milk
dash salt
dash pepper
a little bit of dried parsley flakes, maybe 1 Tbsp
elbow macaroni
cauliflower
I just now realized that someone in this house bought 2% milk.  I always buy 1%, and the nutritional values in this recipe are calculated for 1% milk.  
 Here's what you do:

1.  Heat oven to 350F
2.  Cook pasta according to package directions.  Reserve 1/2 C pasta water.  Drain the rest and set aside.
3.  While pasta is cooking, steam cauliflower (in a steamer or in the microwave with a smidge of water in the bowl), chop it up small and set aside.
4.  In a small dish mix together bread crumbs, 1 Tbsp parmesan, and parsley.  set aside.
5.  After you drain the macaroni, leave it in the colander.  In the same pot you cooked the macaroni, put in the shredded cheese, 3 Tbsp of the parmesan, the cream cheese, 1/2 C pasta water and milk on low heat.
6.  Stir until all the cheeses are melted and combined together and creamy.

7.  Add the macaroni back into the pot with the cheese.
8.  Add the cauliflower to the cheese.  Mix thoroughly until macaroni and cauliflower are completely covered in cheese.
9.  Dump into a sprayed baking dish and top with bread crumbs.  Bake for about 20 minutes.

Makes 10 servings of 1/2C each.


Sure, it's not the intense shade of radioactive yellow as you get with a box of Kraft, but it is creamy, cheesy and delicious...and much better nutrition-wise.

Here's how the numbers break down for 1/2C:  158.3 calories, 4.6g fat, 3g saturated fat, .25g polyunsaturated fat, .39g monounsaturated fat, 14.5g cholesterol, 195.8mg sodium, 192.8mg potassium, 19.9g carb, 2.6g fiber, 9.2g protein. (4 Points Plus) To further reduce the calories and fat you could use reduced fat cheddar instead of the regular cheese I used in this recipe.  You could also lower a few calories and carbs by eliminating the bread crumbs on top.

I got this recipe off Pinterest from Eat Yourself Skinny, but I didn't like their original recipe.  It was very dry, and they added a whole box of pasta (2x what I did here) and it was enough to feed a bleeping army.  Most of it went into the trash because there was just too much.  So to make it cheesier and creamier I kept the same amount of everything except cut the pasta in half.  I really liked the way it turned out tonight.  I think this page in my recipe book will get used quite a lot.  My mom made me a blank cook book with spiral binding and a personalized cover, and I get to fill it in with all my favorite recipes.  It's pretty awesome, except it's getting full really quickly.  I'm going to need another one.  Christmas is coming. ;)  Anyways, you can always tell the recipes I use a lot because they have stains on the pages from my splatters and spills.

I really recommend you try this recipe.  It's very delicious, and with the cauliflower it's a nice spin on the standard American fare.

Eat Happy!
Lisa
PS  Hover over the black bar on the right side of the screen to pull out more menu options for my blog.
happyfairylove@live.com


Wednesday, September 26, 2012

Caramel Grapes?! They Taste Just Like Miniature Caramel Apples!


So since I can't sit and munch on a sticky, chewy caramel apple this fall, I couldn't resist trying out this great idea I saw on Pinterest.  Caramel grapes!  I know, right?  Grapes???  Yes!  Don't let that throw you.  If you want to experience the taste of a caramel apple, but don't want to be strapped with all the calories and carbs, you've got to try these.  These little cuties will take away your craving for the fall-time treat with much less damage to the waistline and glucose levels.  It's very easy.  A little time consuming, but I had my daughter help and it went much faster.

All you need are large green seedless grapes, 1 C caramel chips, 1 C salted peanuts, 2 Tbsp whipping cream or heavy cream and toothpicks.  I didn't know what caramel "chips" were, but they were right in the Halloween candy section.  They are little tiny caramel balls specifically for melting and making caramel apples with.  I'm sure that regular caramels would work too.  They just may take longer to melt than the little bits.

First, I chopped up the peanuts to small bits using my very handy Ninja Express Chop.  Then, put the caramel chips and cream in a little pot on medium heat and stir a lot until they are melted.  Then just turn the burner down to 1 while you are dipping the grapes.  All you do is put the toothpick in the grape, swirl it around in the melted caramel and then dip in the peanuts. 

What a fun fall party idea, isn't it?  Make sure your peanuts are salted.  The salty taste mixed with the sweet richness of the caramel is to die for.  Three grapes is approximately 140 calories (be careful!!!), and 15.2g carbs.  These aren't exactly "healthy", but like I said, it's better than sitting down with a whole caramel and peanut covered apple.  Fun, fun party idea!  Just be strict with yourself and limit how many you eat.

Lisa
PS Hover over the black bar on the right side of the screen to pull out more menu options for my blog.
happyfairylove@live.com


Spinach Dip With All the Taste and None of the Fat (recipe, pics)

One of the things that is always requested of me when we go to get-togethers is my delicious spinach dip.  It's like it's some gourmet thing that is too difficult for other people to make and they have to wait for me to come over to give it to them.  lol.  It's really so easy.  You know me...it has to be easy!

My kids really love it, and lately they have been asking me to make it again.  I decided to "healthify" this recipe, and I was a little concerned that taking out the fat would compromise the taste.  But it didn't.  It tastes just as good as the full fat version.

I considered trying it with plain yogurt, as I've heard some people use that in place of sour cream.  However, I used plain yogurt in a similar dip the other day and I truly hated it.  It looked gorgeous in presentation, but the taste was "ick"!  Plain yogurt, in my opinion, is no substitute at all for sour cream.  I decided to try fat free sour cream instead.  And you know what?  It works!  I mixed up a batch, and the kids didn't even know that I made a switch on them.

Here's what you need:  Very basic!

16 oz fat free sour cream
1 packet powdered ranch dip mix
10 oz package spinach, thawed with all the water squeezed out and torn apart
5 green onions, finely chopped (I only had 4, but more would have been better)

Put everything into a bowl and mix together.  Simple!!!  It is best to let it chill in refrigerator for a while before serving so that the flavors have time to meld.  Serve with vegetables, crackers, pita chips, crusty bread, etc.

The nutritional information for  1/4 C is 58.6 calories, .7g fat, .13g saturated fat, .2g polyunsaturated fat, .3g monounsaturated fat, 560mg sodium, 175mg potassium, 8.8g carb, 1g fiber, 2.8g protein.  (1 Points Plus) There are about 9 servings for this recipe.  Just remember to add in the calories and carbs for the foods you dip into it.

This is such a great recipe for game days and buffets for the many get-togethers that are bound to happen coming soon with the holidays quickly coming up.  It'll be a favorite, I'm sure of it.  It definitely is in my circle!

Enjoy!
Lisa
PS  Hover over the black bar on the right side of the screen to pull out more menu options for my blog.
happyfairylove@live.com


Monday, September 24, 2012

Cheeseburger Quesadilla

Right now I am eating a very good dinner, licking my fingers so I don't get anything on my keyboard.  How about mixing the best of American fare with a Mexican staple?  A cheeseburger quesadilla!  It's so appetizing, yummy and filling, and oh so simple to make.

I mixed some chopped onions in ground beef and added in some italian seasoning.  How do you like your burger meat?  Maybe chili powder or garlic or whatever floats your boat.  Just toss it in a skillet and brown it all the way through, smashing up the big pieces so there aren't any giant chunks of beef.

Next, spray a griddle or skillet with canola cooking spray and put a low carb, high fiber tortilla on.  I used Xtreme Wellness tortilla wraps from Ole Mexican Foods.  You can use whichever brand you want, but you'll want one that's bigger than a fajita size so you have room to fold over all the meat and toppings.

Measure out 3 oz of cooked beef on your kitchen scale and place on 1/2 side of the tortilla.  Top with 1/4 C shredded cheese.  Cook the tortilla until the bottom is golden brown and a little crispy.


Top with your favorite burger toppings like lettuce or tomatoes, ketchup, mustard, whatever.  Just make sure you count the calories and carbs for whatever you top it with.  I used the avocado hummus I posted previously with a smidge of mayo and a hint of ketchup.  It reminded me of the amazing Maui Burger at Island's...omg so good!  My favorite!


The tortilla I used has 110 calories, 4.5g fat, 1.5g saturated fat, .5g polyunsaturated fat, 1g monounsaturated fat, 390mg sodium, 14g carbs, 9g fiber and 4g protein.  The nutrition data for ground beef varies, and it depends on the percentage of fat in the beef.  Obviously, the leaner the better.  I think mine was 90% lean, but I usually get what's on sale.  Just drain off the fat before you serve it.  And remember, too, that shredded cheese (depending on the type or brand) carries approximately 100 calories per 1/4 C.  It adds up fast so be careful!

The low carb, high fiber tortilla is better in nutrition than most hamburger buns out there, and it's a nice switch-up from a traditional burger.  You could even top it with salsa (recipe here)...mmm that would be good, too!

Enjoy your American fiesta!
Lisa
PS  Hover over the black bar on the right side of the screen to pull out more menu options for my blog.
happyfairylove@live.com

Sunday, September 23, 2012

Homemade Salsa is the Best and So Easy!

A few days ago I told you about my new favorite kitchen gadget, the Ninja Express Chop NJ100.  I've been using it a lot, and it was so more than worth the $20 it cost me at Target.  This morning I whipped up a batch of home made salsa in no time at all.  The beauty of salsa is that almost anything can go in it, and it will turn out great.  I just made something really basic with things I had in my kitchen.
I forgot to put the fresh garlic in the photo.
I used roma tomatoes, a little bit of fresh cilantro, onion, olives, garlic and sliced jalapenos.  These were no heat ones, but I wish they had a little more kick to them.  My salsa wasn't quite spicy enough.  I also should have added a little salt, I think.  I didn't measure anything.  I just chopped up some of this and some of that and tossed it together until it seemed about right.  How's that for instructions?  lol  If you don't have a chopper or food processor, just chop up everything very fine.  I chopped up 6 roma tomatoes and threw them in a bowl.  I had a can of already chopped olives in the cupboard and used about 3 Tbsp of those.  I put in about 1/4 C of "no heat" jalapenos and 2 cloves of garlic.  My onions were already done from one I had leftover the other day, and I used about maybe 1/2C chopped...more than 1/4C, but maybe not as much as 1/2.  Somewhere in there...put in as much as you prefer.  The cilantro I just cut up with a knife.  A little cilantro goes a long way. I only put in about 1 Tbsp finely chopped up.  Easy peasy.  There are next to no calories in salsa.  I didn't bother doing any calculations because everyone's will be a little different.  But the jar of Herdez I have in the fridge is only 5 calories for 2 Tablespoons.  Add anything you want...diced chiles, fresh seeded jalapenos, corn, red peppers, anything at all.

So I took a small fajita sized tortilla, sprayed a pan with canola spray and turned the heat to medium high.  I put the tortilla in and cooked it until it was golden, sprayed the top side with canola spray and then flipped it over and cooked the other side.

Then I got 1/4 C of the avocado hummus I previously wrote about and spread it on top of the cooked tortilla.  I sprinkled on 1/4 C shredded cheese, and then topped it with about 1/4C of fresh home made salsa.  What a delicious light lunch or protein and fiber rich snack!  And the avocados add some great healthy fats to the mix.  It was so wonderful.  I'm glad I still have more avocado hummus and salsa to make another one later!

Salsa is so easy to make, it's versatile and refreshingly delicious.  You should go make yourself a batch!

UPDATE:  When I went grocery shopping tonight I picked up a small can of hot diced jalapenos.  I added about 1 1/2 Tbsp of that to my batch of salsa, and now it is absolutely perfect!!!  Better than any jar I've ever had.  Sometimes I amaze myself. ;)

Ole!
Lisa
PS  Hover over the black bar on the right side of the screen to pull out more menu options for my blog.
happyfairylove@live.com


Friday, September 21, 2012

Salmon Patties (Recipe, pics)

I'm not a big fan of fish, except tuna, but I have said that I will keep trying new kinds to see if I can find one or two that I like.  My vegetarian daughter, who is actually a "pescatarian" (a vegetarian who will eat fish) requested we try salmon in some way.  I remember having salmon patties occasionally when I was a kid, and I remember getting my way through them, so I thought that might be a safe place for me to go with it.

I'm not well-versed in what brand of salmon is best, since I don't know what "good" salmon tastes like, how would I know how to choose a can of it?  I did what any other connoisseur of fine canned salmon would do...I chose the middle-priced can.  lol

Got out my recipe, got out my ingredients and was ready to tackle salmon patties.  Then I opened a can.  o.m.g.  I was not prepared for what I saw in that can...silvery skin and spinal bones.  Like, whole spines.  ew.  I dumped the fish into a bowl and started the task of going through it all and trying to pick out all the vertebrae.  My nose was in a permanent crinkle the whole time.  In fact, it's in a crinkle now just thinking about it.

Fast forward to after dinner for a minute.  I went online and did a Google search about bones in canned salmon.  Apparently they are soft, edible and extremely rich in calcium.  Some people just mash the bones right up in their fish and eat it.  I, on the other hand, don't want to do that.  Other people who are in my thought camp recommend Bumble Bee in the smaller tuna-sized cans because they say they are skinless and boneless.  That's what I'll be buying next time for sure!

After I got all the bones and soft skin picked out of the salmon I started making the patties.

Here's what you need:

14-15 oz canned salmon, drained and flaked with a fork
1/2 C panko (Japanese bread crumbs)
1 egg
2 Tbsp milk
3/4 tsp dried dill weed
1/8 tsp black pepper
a few drops of hot pepper sauce
Cooking spray
1 tsp olive oil


Here's how to make them:

1.  In a large mixing bowl, mix panko, egg, milk, dill weed, black pepper, hot pepper sauce.  Add salmon and mix well.
2.  Measure out 3 oz portions and form into patties.
3.  Spray large skillet with cooking spray.  Heat over medium high heat.  Add patties and cook 3 minutes or until lightly browned.
4.  Add oil to skillet.  Flip patties and cook 3 minutes or until firm and lightly browned.

Makes 4-5 patties.  Serve with tartar sauce, optional (remember to count those calories, too!)


Super easy to make (after the whole bone ordeal).  My kids are not used to the taste of any kind of fish, except tuna.  I was pleasantly surprised when Matthew said, "Wow, Mom...these are really good!"  My non-meat eater really liked them, too.  Until she found a vertebrae.  She said, "What's this?"  I said, "It's a spine bone."  She immediately spewed the bite in her mouth back on her plate. lol.  Guess she didn't like the thought of bones in her salmon either.  Thing is, she did really like the salmon patties.  She just got grossed out by the bone.  But it was a little bit funny.  She's going to be 17 next week, and her boyfriend was sitting next to her.  It was humorous to see a girl that age spit out her food so emphatically and totally gross out her boyfriend.  lol

I WILL be making these again; however, next time I will make sure to buy the boneless, skinless salmon, even if it costs a little more.  The flavor is very mild, which I like, because the fish taste was not overwhelming.  The texture was very good, too.  It reminded me a lot of tuna, but different, if that makes any sense.  So easy, and the Omegas are always a positive.

The nutritional stats I came up with are (for 1 3oz patty):  185 calories, 59.5g fat, 1.2g saturated fat, 119.2mg cholesterol, 416.7mg sodium, 26.7mg potassium, 5.7g carbs, 25.7g protein.
VERY HEALTHY!!!
The Points Plus calculator said 1 salmon patty is 18 Points Plus, which is insane.  I know it's because of all the fats, but the Points Plus calculator doesn't seem to care that it's healthy fish fats/oils.

Don't let my icky story of the bones scare you away.  I just thought it was a little funny.  Truly, the salmon patties were very good!

Eat well,
Lisa
PS  Hover over the black bar on the right side of the screen to pull out more menu options for my blog.
happyfairylove@live.com


Thursday, September 20, 2012

Strawberries N Cream Bars (Recipe, Pics)

Sheer decadence.  That's all I can say.  I saw this recipe on Pinterest and changed it up to make it a little healthier.  I substituted Egg Beaters for real eggs, I Can't Believe It's Not Butter for real margarine, substituted some of the sugar with Stevia and used reduced fat cream cheese.  You still need to limit yourself to one, but if you are having a special get-together, potluck or something else where you want to serve something special (and that's soooo easy but no one has to know!), then this is a great treat for you to make.  It's an incredible, tasty little morsel for the end of a delicious dinner.

Here's what you need:

1 regular sized box vanilla or yellow cake mix
1/3 C I Can't Believe It's Not Butter
1/2 C plain Egg Beaters or other egg substitute, divided (1/4C in the dough and 1/4C in the cream cheese mixture) or 2 eggs
1 lb sliced strawberries
8 oz reduced fat cream cheese
2 Tbsp sugar
3 1/2 Tbsp Stevia
1 tsp vanilla

Here's how to make it:

1.  Preheat oven to 350F
2.  Spray 9x13 pan with cooking spray (I used a 10x10 pan)
3.  In a medium bowl combine ICBINB, 1/4C egg substitute, and cake mix.  Mash with a fork until partially combined.  It's very sticky, so we sprayed our hands with cooking spray and then used our fingers to combine it completely into a dough.

4.  Reserve 3/4C of the dough for the topping and set aside.
5.  Press the dough into the bottom of the pan, all the way to the edges.

6.  Bake for 10 minutes.
7.  While the crust is baking, slice the strawberries in approximately 1/4" slices.
8.  In a mixing bowl, beat cream cheese, sugar, stevia, vanilla and 1/4C egg substitute until creamy and well combined.
9.  Spread cream cheese mixture on top of the partially baked crust.
10.  Evenly arrange the sliced strawberries over the cream cheese mixture and then crumble the reserved dough on top of the strawberries.

11.  Bake for 25 minutes, or until crumbs on top turn golden brown.  The original directions said the center should be set, but mine wasn't really completely set; however, once it chilled it was fine to all of us.

12.  Cool completely and then chill for at least 30 minutes before servings.
13.  Cut into 20 pieces.  Store leftovers in an airtight container.
Heaven on a plate.  This is simply divine.  You need to be careful not to over-indulge here.  The calories and carbs could get away from you very quickly.  I can't imagine what the stats on this dessert would have been had I not made the substitutions I did.  They have 136.4 calories, 5.8g fat, 3g saturated fat, .7g polyunsaturated fat, .3g monounsaturated fat, 8mg cholesterol, 264mg sodium, 44.7mg potassium, 20.6g carbs, .5g fiber, 2g protein. (4 Points Plus)

UPDATE:  It's the next day after making this dessert, and I had put the leftovers in an airtight container like the directions said.  I don't recommend making this a day ahead of an event because even though it still tastes amazing the next day, it doesn't look as pretty.  The strawberries get a little bit of a dull color and they get a little soggy.  Taste-wise, still awesome, but to impress with presentation I recommend making it the same day. Texturally it's a little softer, too.  But believe me, there was no problem with making the leftovers disappear when the kids got home from school today!

Blissful Tasting!
Lisa
PS  Hover over the black bar on the right to pull out more menu options for my blog.
happyfairylove@live.com